Physical Address
304 North Cardinal St.
Dorchester Center, MA 02124
 Skip to content
Physical Address
304 North Cardinal St.
Dorchester Center, MA 02124

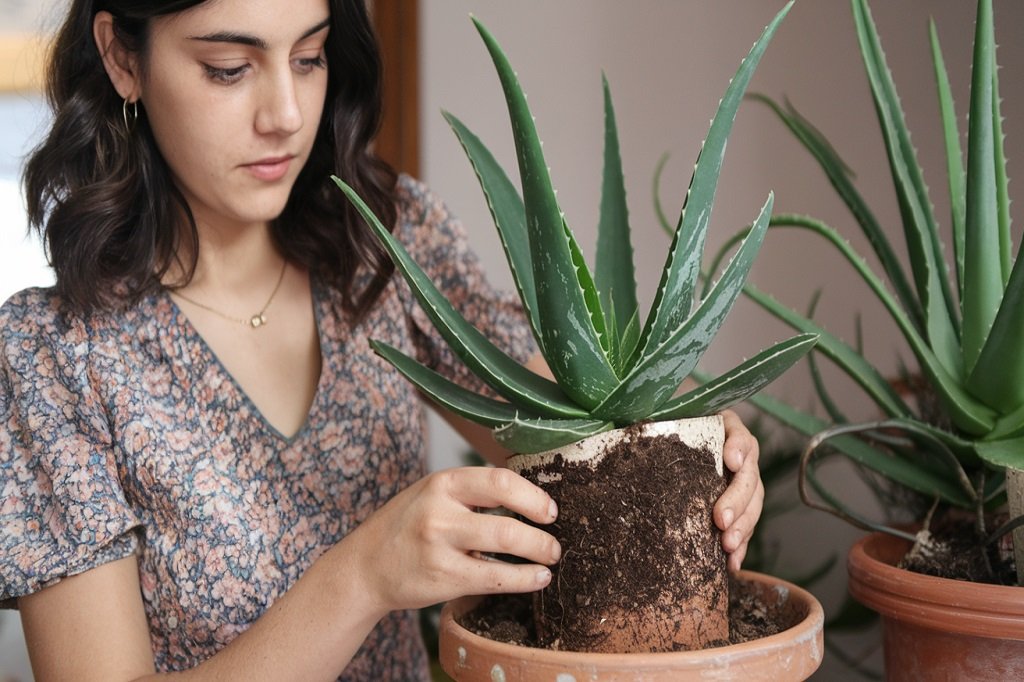
Learn how to repot aloe vera plants at home with this step-by-step guide.

You will agree with many plant enthusiasts that aloe vera is one of the easiest houseplants to grow because it easily adapts to indoor conditions. However, understanding when and how to repot aloe vera plants is vital in ensuring they blossom and remain healthy for many years. So, when should you repot your aloe vera? Well, read through this step-by-step guide and understand the signs to look out for. Furthermore, learn how to carefully repot aloe vera plants so they will continue to grow and blossom with ease.
Repotting aloe vera after a couple of years is important because it ensures that it remains healthy. Consider repotting your aloe vera plant when you witness the following situations:
Repotting aloe vera is not hard. However, it is different from other indoor plants because of various factors such as soil type, container type or potting soil mix to use. Here’s a step-by-step guide on how to repot aloe vera plants for maximum growth.
Ensure the new container is at least 2-3 inches deeper and 2 inches wider than the diameter of the aloe vera plant. Additionally, ensure the container is well-drained, allowing water to flow easily through it. It’s advisable to repot your aloe vera plant in a slightly wider pot than the original one because they do well in small pots/containers. Besides, small pots help your aloe vera plant grow easily in its new space.

While aloe vera can grow in glass, metal or plastic pots, it’s advisable to use a ceramic one. Porous ceramic pots are ideal because they allow free air flow through the pot therefore ensuring your soil dries out a less fast than it would in other containers.
Carefully fill ¾ of the new pot with a nutritious mix that includes rock and organic components. The rock component provides strength and air pockets for better drainage.
Carefully remove the aloe vera plant from its original pot and remove a considerable amount of soil from the root ball.
Carefully examine for any issues with the plant’s roots. If some roots are intertwined, carefully unwind them before you repot the plant.
It’s ok to cut off some roots while you loosen them. This encourages new growth in your aloe vera plant.
If your aloe vera plant has dead leaves around the base, it’s advisable to remove them, thereby ensuring sufficient airflow and a clean plant. More space at the base of your aloe vera plant also allows the plant to dry faster, thus preventing rot from excess moisture.
Aloe vera plants propagate themselves by growing pups or offshoots. If your aloe vera plant has some offshoots (pups) at the base of the mother plant, consider removing them and transplanting them into well-drained containers.
Make a small hole in the top of the soil mixture and strategically position your aloe vera plant. Ensure the roots are fully covered with soil, but keep the leaves exposed.
Delay a day or two before watering your newly repotted aloe vera plant. This allows the disrupted roots to heal before being soaked with water. Later, water the soil without directly touching the aloe vera plant. Additionally, allow the soil to dry between your watering sessions. This is important because it allows your aloe vera plant to get accustomed to the new conditions.
While aloe vera gel is safe, aloe vera leaves are toxic to cats and dogs and can cause diarrhea, vomiting, and lethargy. Consider placing your aloe vera plant on a high shelf away from your pets.
Aloe vera needs enough light to blossom. Therefore, placing your aloe vera near south-facing windows with good access to light is ideal.
There is no harm in using aloe vera gel straight from the plant. You can cut off a new leaf, depending on the thickness, and use it on your skin. Aloe vera gel is ideal for sunburns and other skin irritations.
 Optimized by Seraphinite Accelerator