How To Make Chicken Noodle Soup at Home

Feeling under the weather or simply craving a bowl of comforting warmth? Do you know how to make chicken noodle soup? Well, worry no more cause there is nothing that beats the classic charm of homemade chicken noodle soup. It’s more than just a meal, it’s a trip down memory lane, evoking the cozy moments shared with loved ones, especially those fondly remembered times with grandma. Such cherished experiences make chicken noodle soup the ultimate comfort food, perfect for lifting your spirits or warding off a chill.

However, making chicken noodle soup at home can feel intimidating for many. It’s often assumed to be time-consuming or overly complex. The truth? With the right guidance, anyone can whip up this heartwarming dish. In this article, we’ll walk you through the simple steps to make chicken noodle soup at home so you can enjoy its nourishing goodness straight from your kitchen. Let’s dive in!

Ingredients and Items Needed to Make Chicken Noodle Soup at Home

You will need the following items and ingredients for preparation of chicken noodle soup at home:

how to make chicken noodle soup at home
  • Chicken
  • Noodles
  • Homemade chicken broth
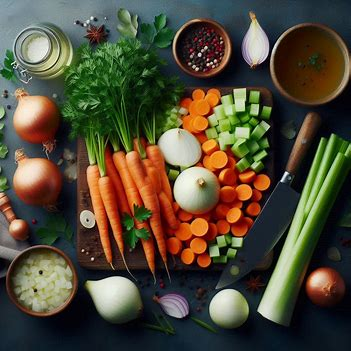
  • Vegetables such as carrots, celery, and onion
  • Seasonings such as salt, pepper, thyme, and bay leaves
  • Garnishes such as Fresh parsley and lemon juice
  • Large pot or Dutch oven
  • Cutting board and knife
  • Measuring cups and spoons
  • Ladle and serving bowls

Preparing the Chicken

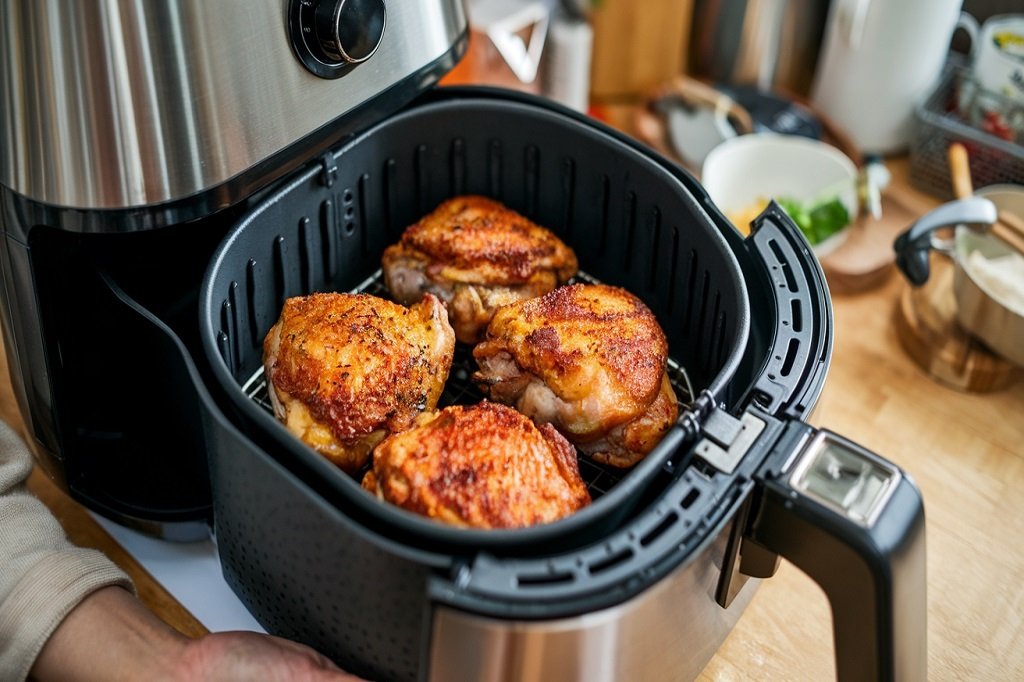
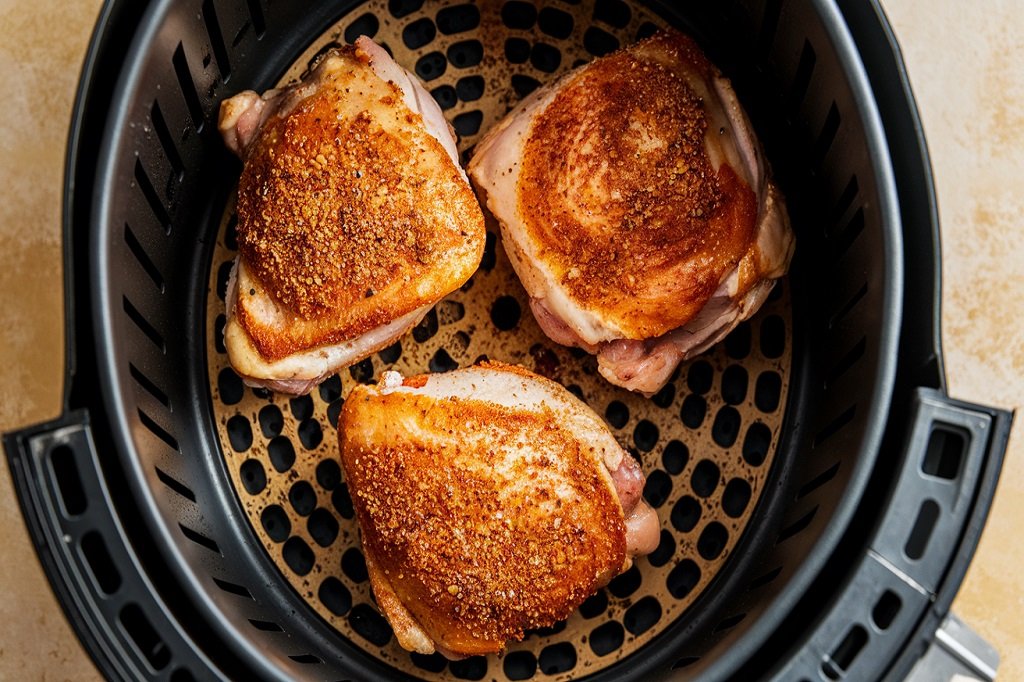
You can use either a whole chicken or some parts of the chicken. One of the most preferred parts is thighs. Furthermore, it is important to use cold running water to wash the chicken. After that, it should be dried with a kitchen towel.

To season your chicken, consider using salt and pepper. Seasoning enhances the flavor of the chicken and the taste of the soup.

Chop the Vegetables

Dice carrots, onions and celery. These three veggies serve as the foundation for a classic mirepoix, which gives the soup a deep, fragrant taste.

Cut the onions into small and consistent pieces to promote even frying. After peeling, cut the carrots into half-inch pieces. To match the carrots, cut the celery into pieces of the same size. This consistency aids in the vegetables’ even cooking and smooth integration into the soup.

You should mince your garlic. Garlic gives the soup body and a hint of spiciness. Finely chop a few garlic cloves, to fully release their flavor as they cook.

Cooking the Chicken

In a large stockpot or Dutch oven, heat some butter or olive oil over medium heat until melted but not boiling. Add the diced onions, celery, and carrots. Sauté the vegetables for five to seven minutes stirring occasionally until they start to soften and the onions become transparent. You can choose to add minced garlic at this point and continue sautéing for another minute.

Place your spiced chicken at the top of the vegetables. Now pour enough chicken stock or broth into this pot to cover your chicken entirely. This forms your base where you build up flavor into your chicken as it cooks.

You will want to turn up the heat now to bring it to a boil. Reduce the heat to low after boiling Start off with a lid covering it tightly. Simmer for thirty – forty minutes till thorough cooking takes place i.e. when chicken is done and tender. As time goes on ingredients blend during that long simmering process leading to soup with abundant taste.
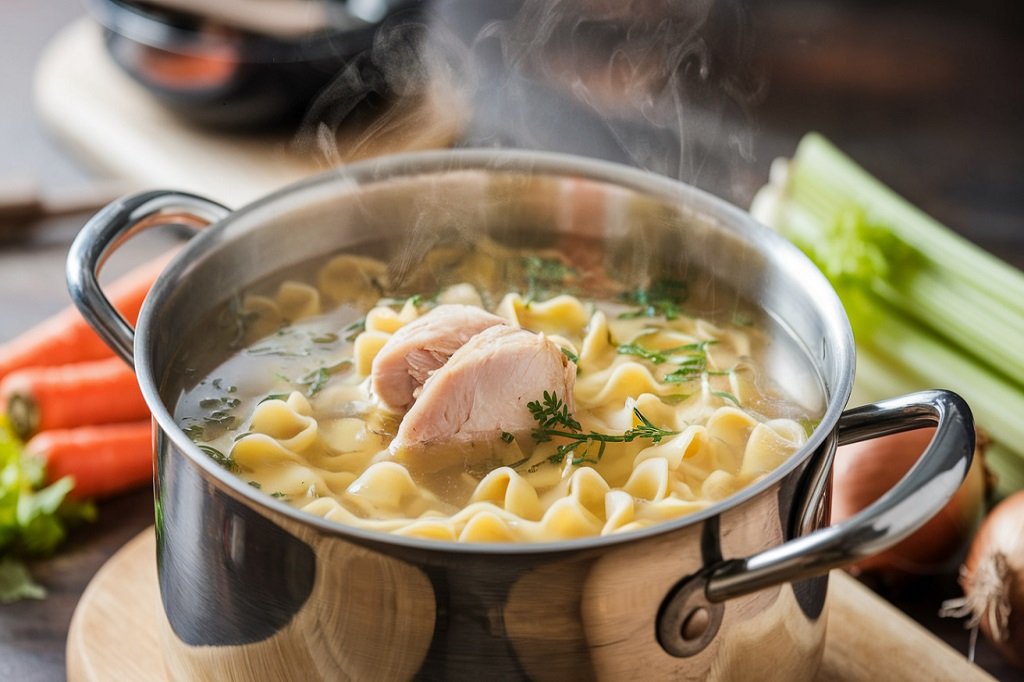
Simmering the Soup

To ensure you make the best chicken noodle soup, you should continue gently boiling the chicken and broth after adding them to the pot. This entails reducing the heat just enough so that the soup gently bubbles without coming to a boil.

A simmer typically occurs between 185°F and 205°F (85°C and 96°C). Cook the soup for 30 to 40 minutes on low heat. The slow cooking process tenderizes the chicken and lets the flavors mix.

You might see fat and foam rising to the top while the soup simmers. It’s important to skim this off with a spoon to get a clear, clean soup.

Excess fat can make the soup oily, and the foam, which is made up of impurities from the chicken, can obscure the soup. A lighter, more visually pleasing soup is produced when skimming the surface frequently while it is cooking.

Adding Noodles

After the chicken is cooked through and soft, take it out of the pot and allow it to cool a little bit before shredding. Once the chicken has been taken out, return the soup to a simmer. Now is the perfect moment for adding the noodles. If put in earlier they might get overcooked and soggy.

Noodle cooking times vary according to their kind. For example, egg noodles usually take around 6 to 8 minutes of cooking time. For specific cooking time recommendations concerning your noodles, see the package instructions. Boil the noodles al dente, keeping them firm yet tender, and stir occasionally to prevent sticking during cooking.

Additional Seasoning for Your Chicken Noodle Soup

Once the noodles are done, add the shredded chicken back to the pot and throw it into the broth.

Taste and adjust the seasoning. If necessary, taste the soup and adjust the seasoning. For added taste, add pepper and salt.

Furthermore, to add fragrance, use some herbs such as thyme or parsley while also adding a dash of lemon juice for tanginess that enhances flavor sensation.

Serving Suggestions

You can serve the hot chicken noodle soup with fresh thyme or parsley on top for some flavor and color.

Just before serving, pour a little lemon juice into each bowl for added zest. For a satisfying, cozy meal, pair with some crusty bread or a straightforward salad.

Reasons You Need Air Fryer in Your Kitchen

Are you wondering whether you need it? Well, to be precise, air fryers have taken modern kitchens by storm, transforming how we cook our favorite meals. If you’re wondering why you need it, the answer lies in its versatility, health benefits, and convenience. Additionally, this small but mighty appliance allows you to enjoy crispy, delicious meals with minimal oil, making it a must-have for anyone looking to eat healthier without compromising flavor. In this guide, we’ll explore reasons why you need an air fryer in your kitchen and why it’s a game-changer to your cooking.

What Is an Air Fryer and How It Works

An air fryer is a compact kitchen appliance that mimics the results of deep-frying using hot air instead of oil. Circulating hot air at high speed creates a crispy outer layer on foods like fries, chicken wings, or even vegetables. The result? Your favorite dishes are made with significantly less oil while retaining their flavor and texture.

Do you Need it in the Kitchen?

Well, if you are wondering if you need it in your kitchen, here are some benefits of having one:

1. Healthier Cooking Options

One of the biggest reasons to invest in an air fryer is its ability to make healthier versions of fried foods. Traditional deep-frying requires large amounts of oil, which adds unnecessary calories and fats. Moreover, air fryers use just a fraction of that oil or none at all while still delivering crispy, golden results. Whether you’re making fries, chicken, or even desserts, you’ll enjoy a guilt-free cooking experience.

2. Flexible Cooking Capabilities

Air fryers aren’t just for frying! They can roast, bake, grill, and even reheat leftovers. This versatility makes them perfect for preparing everything from juicy steaks and roasted vegetables to muffins and pizzas. With an air fryer, you can whip up breakfast, lunch, dinner, and snacks easily.

3. Time-Saving

Furthermore, modern air fryers are designed with busy lifestyles in mind. They preheat quickly and cook faster than traditional ovens, making them ideal for whipping up meals on tight schedules. Equally important, many models come with preset cooking programs for common dishes, so you can set it and forget it.

4. Easy to Use and Clean

Furthermore. they are incredibly user-friendly, with intuitive controls that make cooking a breeze even for beginners. Most models come with non-stick baskets or trays that are dishwasher-safe, minimizing the effort required for cleanup.

5. Energy Efficiency

Lastly, compared to traditional ovens, air fryers consume less energy, which can help reduce your utility bills over time. They’re also more compact, meaning they heat your food without warming up your entire kitchen, a bonus during hot summer.

Key Features to Look For in an Air Fryer

Moreover, when shopping for one, consider these key features:

  • Capacity: Choose a size that suits your household. Smaller models work well for individuals or couples, while larger ones are ideal for families.
  • Temperature Range: A wider range allows for greater versatility in cooking different recipes.
  • Preset Programs: Look for air fryers with built-in settings for common dishes like fries, chicken, and vegetables.
  • Ease of Cleaning: Dishwasher-safe parts are a huge time-saver.

Tips for Getting the Most Out of Your Air Fryer

  1. Don’t Overcrowd the Basket: Allow space for air to circulate the food for even cooking.
  2. Shake the Basket: For items like fries or nuggets, shaking the basket midway through cooking ensures a crispier finish.
  3. Experiment with Recipes: Don’t limit yourself to frying, explore recipes for roasting, baking, and grilling.

Lastly, if you’re looking to revolutionize your cooking routine, the answer to “why you need an air fryer” is clear: it’s a healthier, faster, and more versatile way to prepare your favorite meals. With its ability to create crispy, delicious dishes using minimal oil, this appliance combines convenience and nutrition in one compact package. Whether you’re a seasoned chef or a cooking novice, an air fryer is a valuable addition to any kitchen.

How to Keep Pizza Warm: Tips for Perfectly Hot Slices

There’s nothing worse than cold pizza when you’re craving that cheesy, gooey goodness. Whether you’re hosting a party, waiting for a late guest, or just trying to enjoy leftovers at their best, knowing how to keep pizza warm is essential. This guide walks you through the best ways to keep your pizza at the perfect temperature without compromising its taste and texture.


Why Does Pizza Cool Down So Quickly?

Pizza cools down faster than you’d think because it’s exposed to air. The cheese, sauce, and toppings lose heat quickly once out of the oven. Moreover, the crust, acting as a base, absorbs heat and radiates it away. Without proper storage or reheating techniques, your pizza can go from hot to lukewarm—and eventually cold—in no time.

Let’s explore practical methods for keeping pizza warm, whether you’re at home, traveling, or planning a party.


How to Keep Pizza Warm in the Oven

An oven is the most effective and reliable way to keep your pizza warm. Here’s how to do it right:

1. Preheat the Oven

  • Set your oven to 200°F (93°C) or the lowest possible temperature. Avoid higher temperatures as they can dry out the crust.

2. Use Foil

  • Wrap the pizza in aluminum foil to lock in moisture and heat. The Green Lantern Pizza recommends placing the foil-wrapped slices directly on the oven rack.

3. Timing is Key

  • Keep the pizza in the oven for up to 30 minutes. Beyond that, check periodically to ensure it doesn’t dry out or overheat.

This method works well for preserving the texture and flavor of your pizza, making it perfect for small gatherings or late-night snacks.


How to Keep Pizza Warm Without an Oven

Don’t have access to an oven? No problem! Here are alternative methods that work just as well:

1. Use a Skillet on the Stovetop

  • Heat a non-stick skillet over low heat.
  • Place your pizza slice in the skillet and cover it with a lid or aluminum foil to trap heat.
  • Heat for 2-3 minutes, ensuring the bottom doesn’t burn.

This method keeps your crust crispy while warming the cheese and toppings evenly.

2. Invest in an Insulated Pizza Bag

  • Insulated pizza bags, like the ones used by delivery drivers, are great for keeping pizza warm.
  • Place the pizza inside, zip it up, and let the bag’s thermal lining do its magic.

Perfect for picnics or when you’re on the go, these bags maintain heat for up to an hour.

3. Try a Slow Cooker

  • Line your slow cooker with parchment paper or foil to prevent sticking.
  • Stack the pizza slices inside and set the cooker to “warm.”
  • Avoid leaving it in the slow cooker for more than an hour, as condensation can make the crust soggy.

How to Keep Pizza Warm for a Party

If you’re hosting a party and need to serve pizza fresh throughout, consider these strategies:

1. Use a Pizza Stone

  • Preheat a pizza stone in the oven to 200°F (93°C).
  • Once heated, place the stone on a heat-resistant surface and lay the pizza on it. The stone retains heat, keeping your pizza warm for extended periods.

2. Heat Lamps or Chafing Dishes

  • Set up a heat lamp or use a chafing dish with a warming tray.
  • Place the pizza on the tray, ensuring the slices are spread out for even heat distribution.

These methods are ideal for large parties or buffets where food needs to stay warm for hours.


How to Keep Pizza Warm While Traveling

Transporting pizza while keeping it warm can be tricky, but it’s doable with these tips:

1. Use Your Car’s Seat Warmer

  • Wrap the pizza box in a towel for insulation and place it on a heated car seat.
  • If your car doesn’t have seat warmers, keep the pizza on the passenger floor and use the car’s heater to maintain warmth.

2. Portable Insulated Bag

  • Invest in a high-quality thermal bag.
  • Place the pizza box inside and zip it shut. The bag will trap heat, keeping the pizza warm until you arrive at your destination.

3. DIY Thermal Wrap

  • Wrap the pizza box in heavy-duty aluminum foil, then place it in a blanket or towel. This adds layers of insulation to retain heat during transit.

Pro Tips to Avoid Soggy Pizza

While keeping pizza warm, it’s equally important to prevent it from becoming soggy. Here’s how:

  • Use Ventilation: Avoid sealing your pizza in airtight containers, as trapped steam will make the crust soggy. Use foil or slightly ajar lids to allow steam to escape.
  • Elevate the Pizza: Place a cooling rack inside the oven or slow cooker so air circulates under the pizza.
  • Avoid Overheating: Reheating pizza at high temperatures can dry it out or burn the crust, so stick to gentle warming techniques.

Wrapping It Up

Pizza is best enjoyed hot, fresh, and flavorful, but that doesn’t mean you have to eat it immediately after delivery or cooking. By mastering these techniques on how to keep pizza warm, you’ll never have to settle for cold, unappetizing slices again. Whether using an oven, a skillet, or an insulated bag, there’s a method for every situation to ensure your pizza remains deliciously warm.

Next time you’re hosting a party, traveling, or simply saving a few slices for later, you’ll know exactly what to do. Enjoy your pizza at its best—hot, fresh, and irresistible!

How to Make the Best Pizza Dough at Home

Have you ever taken that sweet pizza bite and wondered if you could make homemade pizza? Well, you are not alone. Often, pizza enthusiasts want to get their hands dirty and make the pizza they direly crave. However, to do this, one needs to make good pizza dough. Yet, many people are unsure where to start and fear using yeast. However, Sally agrees that it is easy to make the best pizza dough at home and anyone can become skilled at it even if they have never cooked before. Making one’s recipe for pizza besides controlling its texture and taste brings so many advantages because it turns into something soft, chewy, and packed with aromas.

Homemade pizza dough provides enough freedom to make your dream pizza either with a thin crunchy crust or thick spongy form. In this article, you will learn about all the ingredients required as well as the steps involved so that you can prepare homemade pizza dough confidently.

Ingredients of Making the Best Pizza Dough at Home

Here are the ingredients you require to make a pizza dough:

1. Yeast

One of the key secret ingredients that leads to the actual dough-making is yeast. Instant yeast is preferred as it works fast. An example of such a product is the platinum yeast produced by Red Star. You may also use active dry yeast but you should know it takes more time to rise.

2. Flour

Pizza crust texture depends highly on the flour type utilized. Most recipes typically rely on all-purpose flour, which yields soft chewy crusts. If one is looking for chewier crusts, then it’s better to use bread flour because it has more protein in it. On the contrary, wheat flour may give off a stronger taste.

3. Water

You should use warm water, preferably with a temperature of around 100-110°F as the water activates the yeast hence increasing the rising speed of the dough. Take cause not to use too hot water as it destroys the yeast.

4. Olive Oil

Olive oil is brushed on the dough before adding the toppings to prevent the crust from getting soggy.

5. Salt

Salt enhances the flavor of the dough.

6. Sugar

Sugar also softens and activates the yeast, making the dough almost tender.

Step-by-Step Recipe for Making the Best Pizza Dough at Home

Here are the exact measurements required for this recipe:

What You Will Need

  • 320 ml warm water (this should ideally be at a temperature of between 100-110°F or 38-43°C)
  • 2 and 1/4 teaspoons (about 7g) of instant yeast
  • 3 and 1/2 cups (around 450g) of unbleached all-purpose flour
  • 1 tablespoon (13g) of granulated sugar
  • 2 tablespoons (30ml) of olive oil, plus additional for greasing the pan and brushing on the dough
  • 1 teaspoon of salt
  • A sprinkle of cornmeal for dusting the baking pan

Now, let’s make pizza dough step by step. 

Step 1: Mixing The Dough

In a medium-sized mixing bowl, whisk together sugar with yeast and warm water. Ensure that you have mixed them for about five minutes. If there is some form of bubbling happening then you can be sure that the yeast is working just fine. Next add flour, salt along olive oil.

You should continue mixing until the dough begins to form. During the mixing stage, you can use either a wooden spoon or a mixer that contains a dough hook to mix effectively.

Step 2: Kneading the Dough

Kneading will help in gluten development in the dough hence giving it elasticity. Those who use machine kneaders should knead their dough at low speed for five minutes; while those doing it by hand should dust their working surfaces with flour before transferring the dough to the surface for about 5 minutes until it feels slightly soft or somewhat sticky. Perform a windowpane test to assess if the dough is ready. Windowpane test involves stretching out a small piece with your fingers to see if it’s going to stretch thin without tearing.

Step 3: Rising the Dough

Once the dough kneads have been done, take it to a bowl that has oil and turn both sides so that they are coated. Once the dough has risen and doubled its volume, allow it to rise at room temperature for 60 to 90 minutes covered with plastic or clean cloths. Allowing dough to rise slowly overnight in the refrigerator for 8-12 hours will give more flavor.

Step 4: Shape And Punch Down The Dough

When it has risen, it is time to press down on it to remove any trapped air. If you will be making two pizzas then cut the dough into half. Dust your worktop lightly with flour before loosely shaping each piece into a ball. Cover these with plastic wrap for about five minutes before continuing with other steps. Let the dough be about 1/2 inch thick if you want a thicker crust. For a thinner crust, spread it out further.

Step 6: Topping and Baking

Adjust your oven temperature to 475°F for at least fifteen minutes. For extra crispiness, rub cornmeal on a lightly oiled olive oil baking sheet or pizza pan.

Lightly coat the pizza-shaped dough with olive oil so that it does not get wet after shaping. And bake for 13-15 minutes or until the toppings start bubbling while the crust appears brownish.

Alternative Uses for Pizza Dough at Home

You can create anything from your dough with no limits. Here are some other ways of using your pizza dough at home:

Garlic Knots

The dough should be rolled out, cut into strips, and knotted each strip. After brushing with garlic butter, bake until golden.

Stromboli

Stuff your rolled dough with deli cheese favorites, meats, and veggies; then roll it up burrito-style and bake until the crust is golden brown.

Spinach Artichoke Pizza

Alternatively, if desired, layer mozzarella and parmesan cheese slices on top followed by a creamy spinach artichoke spread as a modern twist.

BBQ Chicken Pizza

Base with barbecue sauce, then top with shredded chicken, red onions, and cilantro.

Freezing And Storing Pizza Dough at Home

You can make enough dough for two 12-inch pizzas. This pizza dough recipe can be prepared before and frozen by putting it into oiled zip-top storage bags once it has risen after rubbing a bit of oil into each piece. Squeeze out all the air and freeze it for a maximum of three months. Take the dough from the fridge to thaw, giving it the night’s time. Allow the dough to rest at room temperature for about half an hour before shaping and getting it to the current point of baking. You can freeze your homemade pizza for 3 months.

FAQs

Is it Possible to Prepare the Pizza Dough in Advance?

The best way to make the dough ahead of time is to place it in the fridge and allow it to rise overnight. This way, you will have a gradually rising dough which provides flexibility while baking pizzas at parties and gatherings. Moreover, this slow-rising kind of dough also assists in developing more flavors.

How Do I Freeze and Thaw Pizza Dough?

Wrap the dough with plastic and put it into oiled bags to freeze it. Before shaping, allow the dough to come to room temperature and thaw it in the refrigerator overnight.

What Happens If My Dough is Too Sticky or Dry?

If when kneading time comes and your dough is too sticky, just sprinkle some flour over it. On the other hand, do not go overboard as this will make the dough dry. On the contrary, if it’s too dry do not add any more flour but instead moisten your palms a bit while kneading to rehydrate the mixture.

Reasons Indoor Plant Leaves Turn Yellow – How to Fix It

You may be wondering, why are my indoor plants turning yellow? Well, indoor plants have for many years kept our homes vibrant. However, they need to be maintained in the right conditions. If their leaves start to turn yellow, something is already going wrong. The progressive yellowing of older leaves, associated with fall, in which new growth is tipped with liveliness, is pretty much normal. However, all of a sudden yellowing on many leaves could mean something crucial has happened. In this article, we’ll look at some common reasons, why the leaves of your indoor plants are turning yellow and provide practical solutions to help restore their health. Before panicking, look closely at the plant and, using this guide, match the symptoms for the right fix to ensure your indoor plant remains green.

Are you Overwatering your Indoor Plants?

 When a plant has excess moisture, its roots start rotting as they are waterlogged. Always be on the lookout for soggy soil that seems to stay wet forever.

How to Fix it

If you notice persistent overwatering in your houseplant, consider reducing its watering frequency and checking its drainage system. Changing how you water the plant will hopefully aid in its recovery over time. Additionally, depending on the type of indoor plant, consult or learn how many times a week you are supposed to water it.

Underwatering Issues

Yellow leaves are one of the signs of drying up due to a lack of water in the plant. Watering your plants frequently and as required will avoid the instance of underwatering.

Nutrient Deficiencies

If your plant lacks certain vital nutrients, it will have yellow leaves. When potassium is missing from within the plant, there will be yellowing along leaf margins whereas depletion of nitrogen will start with older leaves yellowing first. Furthermore, yellowing between the veins is a sign that there is not enough magnesium. For indoor plants lacking nutrients, a slow-release balanced fertilizer should be utilized as a solution.

Poor Soil Drainage

Poor soil drainage makes your indoor plant leaves yellow because the water surrounds the roots and does not drain properly. As a result, yellow leaves will appear in case of bad soil drainage due to the waterlogging of the roots.

How to fix it

Repotting into an appropriate pot with drainage holes is the best cure for bad soil drainage. In addition, utilize a potting mix that is suitable for your plant. Ensure that reused pots are clean and without any particles that could obstruct drainage.

Inadequate Lighting Conditions

Lack of light is another common why your indoor plant leaves are turning yellow. Your indoor plants are unable to synthesize enough chlorophyll. Indoor plants that receive insufficient light frequently have pale or yellow leaves. This is especially common when plants are housed in dimly lit areas or far from windows.

How to Fix it

In case of such, move your plant near the window or else provide artificial light, if it is needed. Some plants want direct sunlight; others prefer shade or low light. Knowing which category yours fits into will help you in creating an area for it to thrive.

pH Imbalance and

pH imbalance does not allow the plant to absorb nutrients effectively making your indoor plant leaves turn yellow. Most indoor plants thrive when the soil has a pH of between 6.0 and 7.0.

How to Fix it

You can measure the soil acidity using testing kits available in different stores. You can correct acidic soils with the addition of lime and alkaline soils with peat moss/sulfur.

Root Health Issues

When roots are continuously exposed to moist, poorly draining soil, deterioration, and root rot result. Wilting, yellowing foliage, and an unpleasant soil odor are signs of root rot. If the root rot is severe, you can also see dark or mushy roots when you inspect the plant.

How to Fix it

You can treat root rotting by repotting the indoor plant with a pot that has sufficient drainage and minimizes watering sessions.

Bacterial And Fungal Infections

Indoor plants may have reduced leaf development and discoloration due to bacterial and fungal infestations. Leaf loss, powdery mildew, and yellow or brown patches are indications of fungal diseases. Yellowing and wilting are common symptoms of bacterial infections; sores or an unpleasant-smelling discharge may also be present.

How to Fix it

Remove affected leaves from fungal infection and apply fungicides to prevent spreading and get rid of it completely. For bacterial infections, remove infected areas and increase airflow around the plant to aid recovery.

In extreme cases, you may have to remove the plant to prevent an outbreak.

Risks of Chemical Exposure

Household cleaning products, air fresheners, and even tap water containing fluoride or chlorine could hinder home-grown indoor plants’ growth. Yellowing, spotting, or browning of leaves can result from exposure to chemicals, especially in sensitive plants.

How to Fix it

Keep away harsh cleaning chemicals from plants as they are harmful. If you think that tap water is causing the problem, fill a bucket with it and stay for a night so that its chemicals evaporate and thus can be used in the morning. Rain or distilled water may also work.

Pests Infestation

Indoor plants are prone to pests such as aphids and spider mites which turn their leaves yellowish in appearance. These pests feed on plant nutrients thus showing signs like wilting changes in color or reduced growth rate.

How to Fix it

You need to check regularly around your plants and look out for pest signs such as sticky residue or webs found on them. Other alternatives can involve using neem oil, insecticide soap, or even ladybugs to manage these insects in large quantities. In addition to that, ensure you isolate any infested plants so that they don’t spread more bugs into others.

Old Age of Plants

The older leaves of aging plants can yellow over time and fall off later on It’s a natural phenomenon but if most of them turn yellow it might reflect a deeper issue related to the plant’s life cycle.

How to Care for Older Plants and Prolong Their Life

After removing the yellowing leaves, make certain that your aging plant receives ample light, water, and nutrients. Older plants can be given new life and renewed vitality by being repotted in fresh soil.  In addition to keeping the plant attractive, regular removal of dead or dying leaves also helps shield it from pests and illnesses.

Some environmental stressors such as temperature changes (fluctuating temperature), drafts either hot/cold can cause stress among plants. This will lead to yellow leaves i.e., when placed close by windows or doors during winter seasons they may be subjected to scorching sunlight eventually turning brown and turning yellow.

How to Provide Your Plants with a Stable Environment

To prevent environmental stress, keep your plants in a stable atmosphere with regular temperatures. The optimum temperature of most houseplants for growth is between 60°F and 75°F. Plants also should be kept away from heaters and air conditioners or in direct window/door drafts.

The use of a humidifier or humidity tray could also be desirable to maintain the proper moisture levels.


In conclusion, understanding why your indoor plant leaves are turning yellow and how to fix it is crucial for maintaining healthy, thriving greenery in your home. From addressing overwatering and nutrient deficiencies to combating pests and optimizing lighting, each solution plays a vital role in revitalizing your plants. By closely monitoring their needs and making adjustments as outlined in this guide, you can restore their vibrant green hue and keep your indoor oasis flourishing.

Learn How to Cook Frozen Sweet Potato Fries in An Air Fryer for the Best Results

Sweet potato fries have gained popularity for their delightful flavor and nutritional benefits. When it comes to frozen sweet potato fries, the air fryer is a game changer! With its ability to deliver crispy, golden fries without excess oil, it’s perfect for quick and healthy snacks or side dishes. By the end of this guide, you will have learned how to cook frozen sweet potatoes in an air fryer ensuring consistently delicious results.

Why Use an Air Fryer?

Wondering why you need an air fryer in your home, Well, worry no more! Air Fryers have revolutionized home cooking and many super moms are using them. Here’s why it’s ideal to cook frozen sweet potato fries:

  1. Crispiness Without the Oil: Achieve the crunch of deep-frying with only a fraction of the oil.
  2. Convenience: No need to preheat a full oven or monitor oil temperatures—just set it and let it work.
  3. Quick Cooking Time: The air fryer cooks faster than a conventional oven, saving you time.

Ingredients and Tools You’ll Need

To get started, you’ll need:

  • Ingredients:
    • 1 bag of frozen sweet potato fries (about 16 ounces).
    • Optional: olive oil spray for extra crispiness.
    • Seasonings like garlic powder, paprika, or cayenne (optional).
  • Tools:
    • Air fryer.
    • Tongs or a spatula for flipping.

Preparing Frozen Sweet Potato Fries for the Air Fryer

While frozen sweet potato fries are pre-cooked and seasoned in many cases, a little preparation can elevate their flavor and texture.

  1. Shake Off Ice Crystals: If your fries have frost on them, lightly shake them off to avoid soggy fries.
  2. Optional Seasoning: Enhance flavor with your favorite spices or a light spritz of olive oil for a golden finish.

Step-by-Step Instructions

1. Preheat Your Air Fryer

Set the air fryer to 400°F (200°C) and let it preheat for 3–5 minutes. Preheating ensures even cooking and helps achieve that desired crispiness.

2. Arrange the Fries

Spread the frozen sweet potato fries in the air fryer basket in a single layer. Avoid overcrowding, as this can lead to uneven cooking and soggy fries.

3. Cook in Batches (If Necessary)

If you have a smaller air fryer or are cooking a large quantity, work in batches. Overloading the basket can prevent the fries from becoming crispy.

4. Set the Timer

Cook the fries for 12–15 minutes, shaking the basket or flipping the fries halfway through. Adjust the cooking time slightly based on your air fryer model or desired level of crispiness.

5. Check for Doneness

Once the fries are golden brown and crispy on the edges, they’re ready! Test one for texture, and if needed, cook for another 2–3 minutes.


Pro Tips for Perfect Fries

  1. Add a Little Oil: While not necessary, a light spritz of olive oil can enhance crispiness.
  2. Shake Midway: Shaking the basket at the halfway mark ensures even cooking.
  3. Customize the Flavor: Experiment with seasonings like chili powder for spice, cinnamon sugar for sweetness, or Parmesan cheese for a savory kick.

Delicious Dipping Sauce Ideas

No fry experience is complete without the perfect dip! Here are some pairings to complement your sweet potato fries:

  • Honey Mustard: A balance of tangy and sweet.
  • Spicy Mayo: Mix mayonnaise with a dash of sriracha for heat.
  • Garlic Aioli: Creamy with a hint of garlic.
  • Maple Syrup and Cayenne: Sweet and spicy perfection.

Why Sweet Potato Fries Are a Healthier Choice

Sweet potatoes are rich in vitamins and minerals, making them a nutritious alternative to traditional fries. They’re loaded with:

  • Vitamin A: Supports vision and immune health.
  • Fiber: Promotes healthy digestion.
  • Antioxidants: Protect cells from damage caused by free radicals.

Air frying further reduces the oil content, making this a guilt-free indulgence.


Common Mistakes to Avoid

  1. Overcrowding the Basket: Too many fries at once can lead to uneven cooking.
  2. Skipping Preheating: Starting with a cold air fryer may result in soggy fries.
  3. Neglecting to Shake: Failing to toss the fries can lead to uneven crispiness.

Pairing Suggestions for Sweet Potato Fries

Sweet potato fries are versatile and pair well with a variety of dishes. Here are a few ideas:

  • Burgers: A classic combo with beef, chicken, or veggie patties.
  • Grilled Chicken: The natural sweetness complements savory grilled meats.
  • Salads: Use them as a crunchy topping for a hearty spinach or kale salad.

Storing and Reheating Leftovers

If you have leftovers, store them in an airtight container in the fridge for up to 3 days. Reheat them in the air fryer at 375°F (190°C) for 5–7 minutes to restore their crispiness.


Conclusion

Cooking frozen sweet potato fries in an air fryer is an effortless way to enjoy a delicious and healthy snack or side dish. With minimal prep, a quick cooking time, and endless seasoning possibilities, this method delivers perfectly crispy fries every time. Follow this guide and your sweet potato fries will steal the spotlight at any meal!

Enjoy experimenting with flavors and serving them with your favorite dishes—you’ll never look at frozen fries the same way again!

How To Cook Sweet Potato Fries: A step-by-Step Recipe

Sweet potato fries are changing how people enjoy their side dishes and snacks. They add flavor in many creative ways, with their bright orange presentation. However, when baked, sweet potato fries maintain their crispiest texture with little oil, making them far healthier than deep-fried russet potato fries. This guide walks you through some of the best methods for consistently achieving wonderfully crispy fries, from temperature to slicing. Along with these wonderful ways to top your fries that truly enhance their flavor, you’ll learn many nutritional benefits associated with sweet potatoes. Get ready, and let’s learn how to cook sweet potato fries.

Equipment Required to Cook Sweet Potato Fries

When preparing to cook sweet potato fries, having the proper tools in your kitchen will undoubtedly help. This is what you need:

  • Sharp Chef’s Knife: You can use it to cut your sweet potato fries into consistent shapes and very thin slices.
  • Vegetable Peeler: If you want your fries without skin, it can assist in removing the skin.
  • Half-Sheet Pans: These big-rimmed baking sheets provide plenty of surface space so you can arrange the fries in a single layer and bake them until they are crisp.
  • Parchment Paper: Parchment paper on baking sheets prevents fries from sticking, keeping the applied coat crispy.

Preparing to Cook the Best Sweet Potatoes

Prepare the sweet potatoes first. You should choose sweet potatoes which are free of blemishes and they should have smooth skin.

Despite the sweet potatoes being nutritious and flavorful, some people opt to peel them when frying to achieve a smoother texture.  Either way, the secret to creating flawless fries lies in the slice. This is how you do it:

The consistency in the thinness of the sweet potato pieces is undoubtedly the key to excellent crispiness in your fries. Again, thicker fries just appear to stay soft on the inside rather than crisp up, even with the 1/4-inch-wide slice. Start by laying the sweet potato on its side, on a solid cutting board. Using a sharp chef’s knife, make a small slice from one side to form a flat base. That way, when you slice the potato, it won’t sway around. The potato should be cut lengthwise into 1/4-inch-thick slabs. Slice your slabs into thin fries by turning them on their sides. For even cooking, try to have your fries all the same size.

How to Add Extra Crispiness to Your Sweet Potato Fries

Sweet potatoes have more moisture compared to regular potatoes hence making it difficult to achieve crispiness. However, we have some tips to help you achieve fries that are crispy and tasty.

Cornstarch coating your fries in cornstarch before baking them is another little-known tip that is crucial to getting incredibly crispy sweet potato fries. Fries should be combined in a large mixing basin with roughly 1 tablespoon of cornstarch for every pound of fries. Fry until well coated, tossing occasionally. Arrowroot starch can be used in place of cornstarch if you don’t have any; however, cornstarch seems to function slightly better. After you’ve dusted them with cornstarch, pour one to two tablespoons of olive oil over each pound. Its oil contributes to crispiness and browning. To ensure that the fries have a good coating of oil, toss them one more.

Arranging your fries on your baking pan is key to making them crispy. They won’t be as crispy if they are too near to one another since they will steam rather than bake. Additionally, ensure to arrange your sweet potatoes in a single layer, not overlapping, across two sizable baking sheets. This way, the surface area of each fry is brought into touch with a heated surface. This helps to develop crispy edges.

Half-sheet pans are what you’ll need because they allow the fries to spread out slightly. It has raised edges to prevent the fries from sticking while shaking or flipping.

Lining the pans using parchment paper will easily help you achieve crispy sweet potatoes since they will not be sticking.

Baking Instructions

Having prepared your fries, it’s time to bake them until they turn golden brown. 425°F is the magic temperature for baking sweet potato fries. They will crisp up nicely without burning thanks to this high heat. Your fries may become a little soggy if you go any lower.

Note: When cooking the sweet potato fries, ensure the oil temperature does not rise too much because it could cause smoke, and make your fries burn before they are thoroughly cooked.

Bake the fries for about fifteen minutes after placing your baking sheets in the oven.

After this first bake, flip the fries using a spatula to switch the trays’ positions. In this manner, the fries bake uniformly on both trays. Fries should be golden and crispy on the edges after baking for a further 10 to 15 minutes. They can easily transition from perfectly crispy to burnt, so give them some attention at the end of the cooking period.

Seasoning the Sweet Potato Fries

Seasoning will help you elevate the taste of your sweet potato fries. While you can salt the fries before baking, it’s preferable to wait until after the fries are taken out of the oven to add the remaining spices.

For optimal results, sprinkle the remaining spices on after baking, as they may burn if added too early. Once taken out of the oven, sprinkle your preferred seasonings over the fries. The most widely used ones are freshly ground black pepper for dimension, cayenne pepper for spice, and garlic powder for an incredibly subtle burst of added flavor.  You can taste it again and adjust the seasoning to your liking. This ensures that you never overpower the natural sweetness of the fries.

The Soaking Debate

When making fries at home, Katie acknowledges that one of the most frequent queries is whether it’s worth the time to soak them in water before baking. Soaking potatoes indeed helps the fries retain their crispness during baking by removing excess starch. But does the same technique apply to sweet potatoes?

Many people have tested with and without soaking the sweet potato fries in hot and cold water. the results were clear: soaking sweet potatoes did not provide major benefits. The hot water-soaked ones appeared to have less crispiness. It turned out that the better way was to just sprinkle the fries in cornstarch before baking. Therefore, save yourself the extra effort—soaking isn’t necessary to achieve a deliciously crispy sweet potato fry.

Some Nutritional Values of Sweet Potatoes

Sweet potatoes are packed with numerous health benefits. For example, Healthline highlights that sweet potatoes have beta-carotene, which converts to vitamin A, a nutrient that is crucial for the immune system, skin, and eyesight. They are also high in fiber; thus helping regulate blood glucose levels and improving digestion.

High on antioxidants—these colorful tubers guard against free radicals and provide essential nutrients such as copper, manganese, and Vitamin C as well as B vitamins including B6. Therefore sweet potato fries serve as a better option compared to regular French fries. There are many dishes with which they match perfectly. Here are some suggestions:

  • With a Burger: You can’t go wrong with crispy fried sweet potatoes served alongside any kind of meat patty regardless of whether it’s classic beef or modern vegetarian.
  • In Tacos: Tacos with sweet potato fries add a unique touch of sweetness that complements chicken, black beans, or grilled vegetables.
  • Serve with Soups: Additionally, sweet potato fries go nicely with thick soups like tortilla, chili, or black bean soup. They provide a great contrast to the soup’s tastes and provide a sensory component to the meal.
  • Dip Options:  You can serve them with fish and chips-style vinegar or malt vinegar for dipping, just like those served with fish and chips.

Sweet potato fries are a homemade and healthier alternative to the deep-fried fries you get from a fast-food restaurant. All you need to do to create crispy skin and delicate insides is to produce thin fry slices, mix with a little cornstarch, and bake at the proper temperature. Furthermore, this is a dish that is as beneficial to the body as it is to the taste senses when taking into account the health advantages that come with sweet potatoes. And now you know how to cook sweet potato fries at home!

How to Make a Chocolate Cake: A Step-by-Step Guide

Any cake enthusiast will confess that a chocolate cake never fails to astonish. With its rich flavors and mouthwatering texture, it creates long-lasting memories, thus making it an ideal centerpiece for celebrations or a sympathetic treat when you feel depressed. This simple chocolaty cake recipe is meant for everyone including people who don’t cook so much. To make this moist and delicious cake, you need easily available elements in most homes such as butter, sugar, flour, cocoa powder, egg, or baking powder. Besides being an incredible dessert during festivals and important occasions, this chocolate cake serves as a flexible foundation for more exotic mixtures. So, come and let us get into the kitchen and learn how to make a chocolate cake!

Ingredients and Equipment

Ingredients

  • 2 cups of white sugar
  • 1 ¾ cups of all-purpose flour
  • ¾ cup of unsweetened cocoa powder
  • 1 ½ teaspoons of baking powder
  • 1 ½ teaspoons baking soda
  • 1 teaspoon salt
  • 2 large eggs
  • 1 cup milk
  • ½ cup vegetable oil
  • 2 teaspoons vanilla extract
  • 1 cup boiling water

Equipment

  • Mixing bowl
  • Electric mixer
  • Two 9-inch round cake pans
  • Wire rack

Preparing the Cake Batter

Step 1: Combine the Dry Ingredients

To begin, preheat the oven to 350°F (175°C). Grease two 9-inch round cake pans with butter or baking spray before dusting each with flour. In a separate bowl, combine sugar, flour, cocoa powder (unsweetened), soda, and powder to make it rise while being mindful about how much you use. Finally, whisk it all together perfectly to get a well-mixed batter.

Step 2: Add Wet Ingredients

After mixing dry ingredients, it is time to combine dry ingredients. Add eggs, vegetable oil, milk, and vanilla extract paying attention to the recommended portions above.

Blend everything with an electric beater on medium speed for about two minutes or by hand, until smooth and uniform. At this point, the batter should start coming together and developing a slight thickness.

Step 3: Add Boiling Water and Stir

As the wet components are being mixed in, slowly add 1 cup of hot water. The boiling water will cause the batter to be thinner, and at the same time, it will also activate the cocoa, enhancing the chocolate flavor. Don’t be frightened if your mixture looks too thin now; that is okay and it will eventually provide very moist cake. Mix everything well so that you get a smooth glossy batter with a perfect consistency.

Step 4: Baking the Chocolate Cake

Once you finish the preparation of the batter, share the batter equally between the two cake pans. Apply flour and oil on them to prevent the cake from sticking. Put down your pans gently on the table for release of trapped air which may have been trapped during the mixing process. Each pan should contain almost equal amounts of batter.

Once you’ve preheated your oven, pop in your pans and bake for 30 to 35 minutes straight. Don’t overbake because it will create a dry cake. This is what guarantees perfect baking. Do not only rely on time as an indicator of doneness. Insert a toothpick into the middle of the cake; if it comes out clean then that means that your cake is done right, but if it collects moist batter on it let it stay in there for extra minutes.

Step 5: Allow the Cake to Cool

After baking time is complete, do not rush to do anything; instead, let them cool on the pans for about ten minutes or so. After that time, they will still be warm enough to handle but cool enough to avoid burning your hands when turned upside down and placed on wire racks by loosening the sides with a knife. This also aids in the circulation of air, which helps prevent moisture absorption by the bottom parts that could make them soggy. This must be done if you want your cake to stay in fine shape because any type of frosting should only be applied after the whole cake has completely cooled down. Otherwise, anything placed on it might as well end up melting.

It is essential to allow the cake to cool before frosting and ensure the cake layers are consistent in terms of shape and size. If not, you can remove the tops of the cakes using a serrated knife to straighten them for layering purposes.

Best Frosting for a Chocolate Cake

it’s time to choose a frosting based on your preference and occasion. Popular options such as creamy chocolate frosting, cream cheese frosting, peanut butter frosting, and classic buttercream.

Frosting Application

To frost, place one layer on a serving plate and spread an even layer of frosting on top. Add the second layer, then frost the top and sides of the cake. Get creative with decorations, such as sprinkles or piped borders.

Cake Storage

The type of frosting largely influences how long cakes can last before going bad. For example, frosted cakes can stay unrefrigerated at room temperature for five days.

A cake that is refrigerated will last 7 days while one left on the table last 3 to 5 days before going stale.

Can You Freeze a Chocolate Cake?

Indeed! You can freeze chocolate cake. Freeze the separate, unfrosted cake layers for optimal results. To do this, just wrap each fully cooled layer in plastic wrap and then a layer of aluminum foil marked with the date. Next, place them in a sealed container for storage purposes for about 3-months. Whenever you want to use the layers, remove them from the freezer then unwrap them, and put them in the fridge to thaw overnight.

How To Unclog a Sink: 7 Ways to Unclog It

Blockages in our sinks can disrupt our daily activities at home. Whether it’s just a slowly draining or a completely blocked one, it’s important to resolve it without delay. Luckily, there are many ways you can unclog your sink ranging from simple home remedies to hiring an expert to assist you in fixing it. In this guide, we will explain how to unclog a sink easily and suggest what to do to avoid having it again in your house.

1. Start With Boiling Water

Liquid Plumbr acknowledges that boiling water is a simple but effective way to unclog a sink. This method works best for minor clogs caused by grease, food particles, or soap scum—anything that can block it up. Simply pour boiling water down the drain, and you will be surprised to see some of the clogging materials melting away!

For this method, boil a kettle or pot of water first so that it gets hot enough before you are ready to undertake the task. As soon as it boils, carefully pour the boiling water directly into the sink drain hole. When you have a double sink, ensure another side’s drain is plugged so that no water backflows into this one. If the drain is slow, repeat the soaking two to three times.

2. Application of a Plunger

Plungers are among the oldest tricks to unclog your sink as they create a vacuum pressure that pushes all obstruction out of pipes. You cannot claim that plungers work only with toilets since they are also effective for sinks.

While using a plunger, you should start by pouring some water into the sink so that it completely covers its cup. This makes the best seal for its sucking ability. Place it well on top of the drain hole before pushing and pulling it repeatedly within twenty to thirty seconds. After plunging, take out the plunger and check if there is any rapid drain; otherwise, you might have to do this again.

3. Apply a Baking Soda and Vinegar Solution

Baking soda combined with vinegar creates a natural chemical reaction that can help dissolve obstructions in your sink. By producing fizzing action, this eco-friendly substitute for chemical drain cleaners works by helping dislodge materials stuck in the pipes.

Start by removing still water from the sink. This allows the solution to reach the blockage. Pour about one cup of baking soda directly down the drain, then follow it up with one cup of white vinegar. You will notice fizzing and bubbling as both elements react together. Quickly place a plug or piece of cloth on top of the drain to keep the reaction focused on the blockage. Let it sit for 15 to 20 minutes before flushing it with boiling water.

4. Utilize a Drain Snake

A drain snake or auger is an adaptable instrument used for removing difficult and obstinate blockages in the pipework. It’s especially good at clearing up blockages that occur due to hair, soap, or food that cannot be gotten rid of through other means.

Start by inserting a drain snake into the drain until you feel some resistance; this means that you have arrived at the obstruction. By turning the handle clockwise, you can attach yourself to the obstruction, and if by chance the resistance decreases, then probably you are breaking it up. Gently pull out the instrument while it still holds on to the obstructions with it. To completely clear any drain, you may have to repeat this technique several times. When all has been removed from the way, use hot water in draining to get rid of any remains.

5. You Should Try the Wet/Dry Vacuum

If the above methods have not worked out, you may want to try using a wet/dry vacuum. This method functions by utilizing powerful suction that removes clogs from the sink’s drain. The first step is to set it on a liquid setting. In addition, ensure it is clean and ready for use. Now, proceed to place the hose on the sink’s drain hence creating an airtight seal around it. For proper sealing purposes, an adapter or piece of cloth might come in handy. Once done, switch on the vacuum and allow it a few minutes to suck out the entire blockage.

6. Clean the P-Trap

A P-Trap can be described as a U-shaped pipe found below your sink whose job is to prevent any debris from getting into your plumbing system. As time goes on, one may find its mouth blocked with oil, hair, and body dirt, rendering the sink useless for drainage purposes.

For cleaning purposes, first put a bucket under the sink, just in case some water or murky stuff breaks off during this process. After disconnecting from both sides using a wrench, loosen those slip nuts positioned on either side of it, then take this part out and scrub it with a brush or wire clothes hanger before rinsing it with fresh water to ensure it is free of obstructions. Later, assemble it back by putting on again his or her nuts after tightening them well enough. Apart from checking for leakages by running some water down into this pipeline.

7. Contact A Plumbing Technician

Even though most obstructions can be fixed by individuals themselves, there come times when experts need to be called in to help them. If after using the above techniques your sink still seems to get blocked, it is high time that you seek assistance from experts. Other indications that suggest the need for a plumbing expert include various clogged water passages within the house, peculiar smells or sounds emanating from the drainage system, or a persistent sluggish flow rate. A plumbing technician can assess the whole situation and determine what caused the blockage, thereby unblocking it. To remove such blockages, they may use sophisticated instruments like hydrojetting and cameras for inspections.

Preventing Future Sink Clogs

Prevention is critical to avoiding future sink clogs. Regular maintenance routines can help keep your sinks clear and flowing freely. One simple way to prevent grease buildup is to pour boiling water down the sink every week. Beyond these, we have baking soda and vinegar treatments, which can be used once monthly to ensure clean drains. Never should we allow kitchen sinks to get clogged with substances such as grease or coffee grounds, while in bathrooms, use shower curtains that prevent hair from getting into waste pipes.

The right products can also help maintain your drains. For instance, enzyme-based cleaners are organically safe and effective means of removing the build-up on them without damaging pipes. Drain screens are another affordable option that can catch debris before it enters the pipes, reducing the likelihood of clogs.

Dealing with a clogged sink doesn’t have to be frustrating. You can clear most of the clogs in no time using these methods, thus ensuring that your sinks continue functioning smoothly. Whether boiling water with a plunger or cleaning out the P-Trap by hand, each method presents a way out of common clogging troubles. Moreover, taking precautions makes it possible to minimize the chances of future obstructions, hence keeping the home running well.

How to Grow Roses from Cuttings: A Step-by-Step Guide

Have you ever desired to grow roses in your garden? Or have you ever visited a friend or a relative and admired their garden of roses and wished you could have yours? Well, you have come to the right place! Roses are timeless symbols of beauty and love, and growing your own is a rewarding experience. Whether you’re a seasoned gardener or a beginner, propagating roses is a simple yet fulfilling way to expand your garden or share your favorite varieties with friends and family. However, you may be wondering, where do I start? While there are numerous ways, this guide will explain how to grow roses from cuttings.


Why Grow Roses from Cuttings?

Growing roses from cuttings offers several benefits. It’s a cost-effective method to propagate your favorite varieties, and it ensures that the new plants will be true to the parent rose. Additionally, nurturing a rose from a cutting strengthens your connection to the plant, making the blooms even more special.


When Is the Best Time to Take Rose Cuttings?

Timing is crucial for successful propagation. The best periods are:

  • Late Spring to Early Summer: Use softwood cuttings from new growth. These are flexible and green.
  • Late Fall to Early Winter: Hardwood cuttings from mature growth are ideal during dormancy.

Softwood cuttings root faster but are delicate, while hardwood cuttings are sturdier but take longer to establish.


Essential Tools and Materials

Before you begin, gather the following items:

  • Sharp pruning shears or a knife
  • Rooting hormone powder or gel
  • A clean container or pot with drainage holes
  • Well-draining potting mix or a mixture of sand and peat moss
  • Clear plastic bag or a small plastic bottle (for humidity)
  • Gardening gloves and disinfectant for tools

Step-by-Step Guide to Growing Roses from Cuttings

Step 1: Select the Perfect Cutting

  • Choose a healthy, disease-free rose plant.
  • Cut a stem about 6-8 inches long, just below a leaf node. Ensure the cutting has at least three leaf nodes and a few leaves.
  • Remove any flowers or buds to help the cutting focus on root development.

Step 2: Prepare the Cutting

  • Remove all leaves from the bottom half of the cutting.
  • Gently scrape the lower 1-2 inches of the stem to expose the cambium layer, encouraging root growth.
  • Dip the bottom end of the cutting into a rooting hormone to boost success rates.

Step 3: Prepare the Planting Medium

  • Fill a container with a well-draining potting mix. You can use a mix of sand and peat moss for optimal aeration and moisture retention.
  • Water the soil lightly to ensure it’s damp but not soggy.

Step 4: Plant the Cutting

  • Make a hole in the soil with a stick or pencil.
  • Insert the cutting into the hole, burying it up to the first leaf node. Firmly press the soil around the base to secure the cutting.

Step 5: Create a Humid Environment

  • Cover the cutting with a clear plastic bag or a small plastic bottle (with the bottom removed). This traps moisture, creating a greenhouse effect.
  • Place the container in a bright, indirect sunlight location. Avoid direct sunlight, as it can scorch the cutting.

Step 6: Monitor and Care for the Cutting

  • Keep the soil consistently moist but not waterlogged.
  • Check for new growth after 4-8 weeks. New leaves or stems indicate successful rooting.
  • Once the cutting has developed strong roots, remove the plastic covering gradually to acclimate it to the environment.

Transplanting the Rooted Cutting

When the cutting has a well-established root system:

  1. Choose a permanent spot in your garden with at least 6 hours of sunlight daily.
  2. Prepare the planting site with nutrient-rich, well-draining soil.
  3. Dig a hole large enough to accommodate the root ball.
  4. Plant the rose, water it thoroughly, and add mulch around the base to retain moisture and regulate temperature.

Tips for Success

  • Choose Disease-Resistant Varieties: This increases the chances of a healthy plant.
  • Use Fresh Cuttings: Stems cut fresh from the plant have a higher success rate.
  • Avoid Overwatering: Too much water can lead to root rot.

Common Challenges and How to Overcome Them

Cutting Fails to Root

  • Solution: Ensure you’re using healthy stems and a proper rooting medium. Double-check that you’re maintaining consistent moisture and temperature.

Fungal Infections

  • Solution: Use sterilized tools and a clean growing medium. Treat any signs of fungus with organic fungicides.

Wilting Leaves

  • Solution: Keep the cutting in a humid environment and avoid direct sunlight.

Why Growing Roses from Cuttings is Worth It

Growing roses from cuttings is not just a gardening task, it’s a way to preserve memories and traditions. Imagine the joy of nurturing a rose plant gifted by a loved one or propagating a rare variety for future generations. With patience and care, your efforts will reward you with stunning blooms that enhance your garden’s charm.


With this guide, you’re equipped to propagate roses like a pro. Now, grab your gardening tools, and let the journey begin!

Exit mobile version