How to Grow Roses: Expert Tips for Thriving Blooms

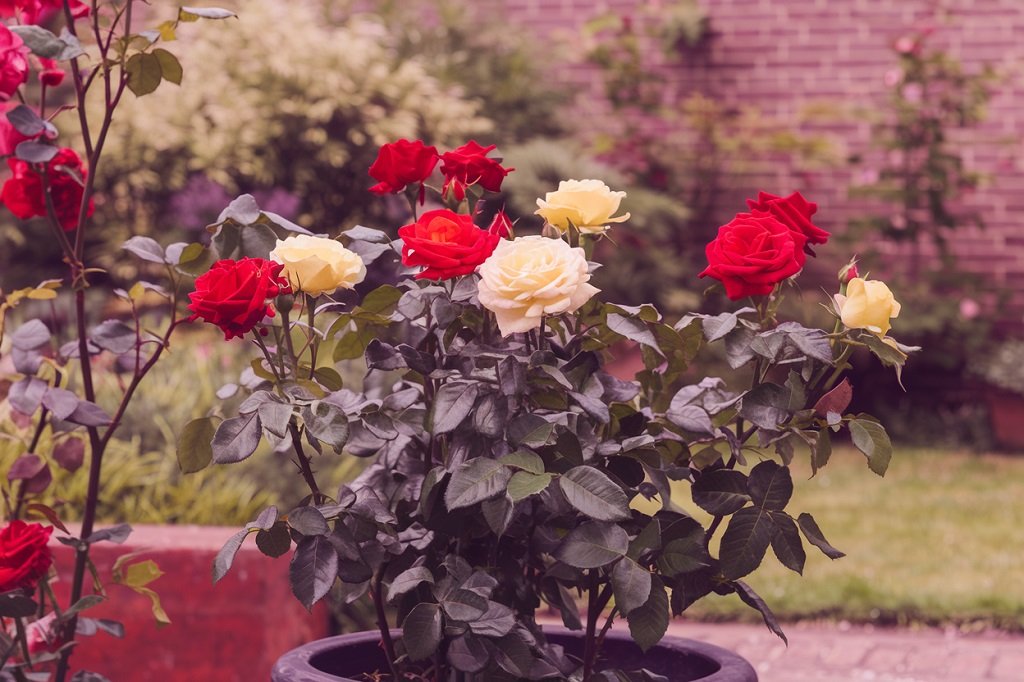
Roses are among the most valued flowers globally for their beauty and fragrance. Various rose varieties are suitable for different garden styles. Therefore, you can get a suitable rose variety for your formal landscape or casual cottage garden. Despite being versatile, roses require special conditions and care. This guide will discuss how to grow roses at home and offer expert tips to ensure they thrive.

How to grow roses

Choosing Between Bare-Root Roses and Container Roses

To grow roses, the first decision you must make is choosing between container and bare-root roses.

Bare-Root Roses

Roses are a cost-effective option because they are available during the dormant season and have a wide range of varieties. Bare-root roses are usually planted early in the spring, usually around six weeks before the last frost, and are lighter and easier to carry. After planting, roses concentrate on developing robust root systems, which may hasten their integration into the surrounding soil.

Container Roses

Pre-potted in soil, these roses are ready for planting right away. Their flexibility comes in being able to be planted at any point during the growth season. Since container roses usually have developed root systems, growth can occur more quickly and transplant shock can be minimized. They also frequently arrive with buds or blossoms, which adds immediate visual appeal.

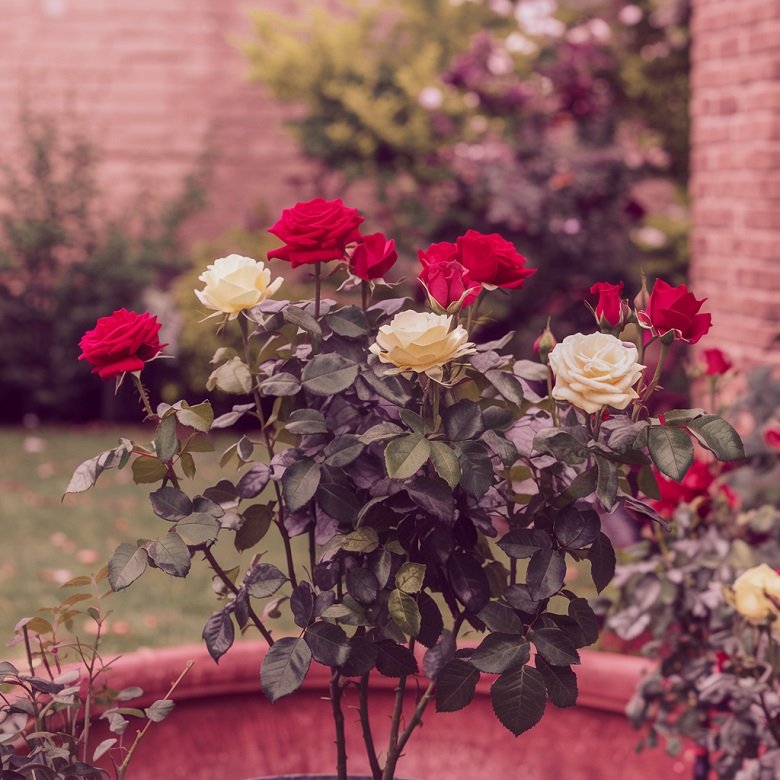
Selecting the Perfect Roses

When selecting roses for your garden, think about their variety and how well they will complement one another to create a unified design. With thousands of options to choose from, it’s important to choose a few well-matched kinds instead of packing too many types into your area. To achieve harmony in your garden, pay attention to color schemes, growth patterns, and bloom dates.

The Best Conditions for Thriving Roses

Roses need between 6 and 8 hours of direct sunlight a day to thrive, and well-drained soil high in organic content. In areas with high temperatures, providing afternoon shade is crucial for protecting plants against scorching heat waves. In cold regions, planting close to a wall or fence that faces south or west reduces winter losses. To optimize nutrient uptake, the soil pH needs to remain slightly acidic at about 6.0 to 7.0. This can be accomplished by adding compost or other organic material to the soil.

When to Plant Roses

Roses grow best in the spring, right after the last frost, or in the fall, at least six weeks ahead of the first predicted frost. Fall planting early enables roots to take hold before dormancy. Usually, only available in the early spring, bare-root roses need to be planted right away. Container roses allow for more planting freedom.

Key Rose Planting Techniques

Follow these steps when planting your roses:

Digging the Hole

Ensure that the hole you are digging for planting has good drainage and enough depth and width so that roots can fit into it.

Preparing the soil

Once all the soil from the hole is out, mix it with plenty of garden compost, peat moss, or any other type of organic matter. Before placing it in the shrub, pour some of this mixture onto its bottom-most part (or at least halfway through).

Crown Placement

In cold climates crown heights should be situated about two to three inches below ground level while in warmer climates, they need to be even with the ground.

Filling the hole

Add a slow-release fertilizer, and use the soil mixture to partially fill the hole. Before applying the final layer of soil, give it a thorough watering.

Final Watering

To help protect the rose while it adapts, fill the hole again, water, and then pile loose soil around the canes.

Spacing

To ensure sufficient space for growth, plant many rosebushes at least three feet apart.

Fertilizing Roses

Roses are among the heavy feeders, so they need frequent fertilization. In early spring, use slow-acting fertilizers that are balanced and per the manufacturers’ instructions. Compost or composted manure are examples of organic sources that provide sustained amounts of nutrients throughout the growth period.

Watering Roses

During the growing season, maintain an evenly moist soil by giving it an equivalent of one inch of rainfall weekly. Heavier clay soils hold moisture for longer, unlike sandy soils which need frequent watering. Hot dry windy weather increases irrigation requirements. Water at the base of the plant to prevent sopping it and lower the chance of disease.

Rose Pruning Techniques

In early spring, remove any dead or damaged canes as part of a significant pruning. Trim back one-third to half of the growth from the previous year until you reach healthy, white centers. Roses should be kept neatly throughout the season by gentle pruning. Deadhead spent blooms on reblooming varieties to encourage further flowering.

Preventing Disease in Roses

To decrease common diseases, choose disease-resistant rose varieties. Water around the base of the plant in the morning to keep the foliage dry, and prune to promote air circulation and minimize fungal infections like powdery mildew. Examine your blooms regularly and apply organic fungicides or insecticidal soaps when necessary. 

In conclusion, growing roses is a fulfilling journey that transforms your garden into a vibrant, fragrant haven. By learning how to grow roses, from selecting varieties to mastering planting and care techniques, you can enjoy healthy blooms year-round. With the right effort, your roses will flourish, becoming a centerpiece of beauty and elegance in your outdoor space. Now, it’s your turn to bring this timeless charm to life!

How to Grow Basil Plants: A Beginner’s Success Guide

Are you a beginner and wondering how to grow basil plants at home? Well, you are not alone. Basil has specific requirements that make it challenging for most people, particularly first-timers. Many people love using basil leaves because they enrich the taste of different meals with additional and unique flavors.

Apart from enhancing the taste, this herb is also associated with multiple health benefits, including those derived from antioxidants and anti-inflammatory compounds. Italian pasta sauces, pizzas, and fresh salads made in Thailand are some dishes that use basil widely. Basil is a versatile plant because it can be grown in small and large spaces. By the end of this post, you will have learned how to grow basil plants at home and enjoy a bumpy harvest of your basil plants.

Understanding Basil

Basil is a plant of the Lamiaceae mint family, and its scientific name is Ocimum basilicum. The Lamiaceae family also includes thyme, oregano, and mint, which are all aromatic herbs. It grows best in warm areas where the temperature ranges from 50°F to 70°F.

If you’re curious about how to grow basil plants, ensuring that you choose the right variety is essential for success.

Usually, the leaves are smooth on the surface; however, some may have slightly serrated edges. The leaf stalks emerge from nodes on the stem and can either be white or purple. The leaves contain essential oils such as linalool and methyl chavicol that give off basil’s distinctive taste and smell.

This plant originated in Africa and Asia. It is worth mentioning that they are sensitive to frost; therefore, it is not advisable to grow basil during winter frost because it will diminish its growth, eventually leading to its dying.

Thai Basil, Purple Basil, Common/Sweet Basil, and Lemon Basil are among the most popular varieties grown. Before you choose the one you want to cultivate for home consumption, let’s look at the various types of basil.

1. Thai Basil

Thai basil has a stronger flavor composed of an anise-like taste combined with a clove-like aroma. It is commonly used in Thai and Vietnamese dishes.

2. Purple Basil

Its dark purple leaves are different from the normal ones; thus, you can never miss purple basil in a salad. Compared to sweet basil, it is spicier.

3. Common/Sweet Basil

You have tasted sweet basil already if you love Italian food because it is one of the most common ingredients in marinara sauce and pesto. It is sweet but has a peppery undertone.

4. Lemon Basil

Are you looking for basil plants that are characterized by a citrus scent? Lemon Basil does just that, bringing an unusual attack to stir-fried vegetables or even soups.

Basil Planting Preparation

Before commencing the planting of basil, there are a few things you ought to know, such as the optimal conditions required. Here are the optimal conditions for growing basil plants:

Understanding how to grow basil plants will help you appreciate its many culinary uses.

  • 6-8 hours of sunlight.
  • Soil that has organic matter and drains well.
  • pH level should be 6.0-7.5.

To have a bountiful yield, whether in soil or big containers, these conditions are important. Furthermore, starting seeds indoors is advisable. This process should begin 6-8 weeks before the last frost date in your locality. Use small pots or seed-starting mix seeds for this purpose. The seeds may be planted around ¼ inch deep into moistened warm soil, which creates an ideal condition for germination. After frost season ends, you can transplant them, ensuring that the right conditions are met first.

Planting Techniques

Basil has two major techniques of planting. You can directly sow the seeds in the ground or transplant the seedlings. We have already talked about how to do transplanting in the previous topic. If you wish to do direct sowing, start by preparing the soil through loosening. The next important step is to mix the compost. Sow the basil seeds approximately an inch deep. They must be spaced about twelve inches apart.

Basil can be grown along with other plants, like tomatoes, as they help in preventing pests. Additionally, basil enhances tomato flavors when grown alongside it.

How to Grow Basil Plants

For you to grow basil successfully, you need to maintain moisture levels at appropriate amounts. Besides, keeping consistent moisture on moist soil may also help, but care should be taken not to drown the plant as this would cause rotting of its roots. Farming experts advise mulching around the basil plants to suppress weeds and achieve soil moisture retention.

To encourage bushy growth, prune basil regularly by pinching off the stem tips and flower buds that may grow. Fertilize basil every 4-6 weeks to increase the harvest.

The Process of Harvesting Basil

After basil plants have grown to between 6 and 8 inches tall, they will be ready for harvest. Regular harvesting encourages plant growth and also allows for more leaves. This should be done every few weeks. Use sharp, clean scissors or pruning shears to cut the leaves during the morning hours. Don’t harvest all the leaves from a plant since it won’t encourage growth. Always leave a few sets of leaves behind.

Basil Storage

When learning how to grow basil plants, proper spacing is crucial for their health and growth.

Furthermore, if you want to know how to grow basil plants effectively, mulching is an excellent technique to suppress weeds.

Knowing how to grow basil plants involves regular pruning to encourage bushiness and growth.

Freezing basil is one of the best ways to keep its flavor intact for future use. Begin by washing the leaves thoroughly before patting them dry. You can either freeze the whole leaves or chop them into small sizes and transfer them into an ice cube tray containing water or olive oil in place of water separately if you don’t want to mix them before freezing them out for later use on an as-needed basis. This will prevent any possibility of memory confusion in case someone wants some in the future.

Once you understand how to grow basil plants, you’ll find that the harvesting process becomes easier and more rewarding.

Once frozen, they should be transferred into an airtight container made from plastic bags, preventing air circulation and keeping them fresh and protected at all times.

After you master growing basil plants, you’ll want to explore different storage methods to preserve their flavor.

Another way of storing it would include drying out basil first. Gather stems, tie them up together, and then hang them upside down somewhere cold and dark with a good ventilation system; allow around two weeks until dried leaves are ready. Pull off carefully from tied stems (by now they’re usually crispy) and place inside an airtight box without packing leaves tightly together (to promote uniform drying).

Furthermore, understanding how to grow basil plants will help you prepare for the drying process as well.

Finally, when considering how to grow basil plants, remember that gardening can be both enjoyable and economical.

Final Thoughts

Basil gardening is budget-friendly and beneficial. Besides, it feels great to know that the food we eat was grown by us and thus that we did not use any harmful chemicals while planting, harvesting, or storing it. There are numerous varieties and flavors of basil, and you should plant the one that you prefer to add taste to your dishes.

How to Prune Roses for Beautiful Blooms: A Step-by-Step Guide

Roses are loved by most flower gardeners but they can be a challenge to grow and keep healthy because they are sensitive plants. Therefore, they are difficult to cultivate and take care of. Nonetheless, proper pruning can easily lead to beautiful and healthy roses of different kinds. Not only does pruning enhance growth, but it also prevents disease occurrence. In this guide, you will learn how to prune roses and get those beautiful blooms you direly desire.

Tools Required

Some of the essential tools required for pruning include:

  • Hand saw
  • Pruning Shears
  • Loppers
  • Gardening gloves
  • Protective eyewear
  • Heavy long sleeves

Ideal Times to Prune Roses

Pruning of most roses happens before early spring starts as this is the time new growth is experienced. During this time one can determine the condition of the plant. For some rose types especially those that bloom on old wood (such as climbing roses) they need to be pruned after flowering has occurred. New buds’ emergence and the lack of leaves a signs you need to prune your roses.

Step-by-Step Pruning Process

Follow these guidelines to prune your roses to help them thrive:

1. Assessing Rose’s Structure and Removing Leaves

Before pruning can start, you are required to assess the general structure and health of the rose plant. Start by removing all of the leaves in your rose bush, which allows you to see the structure of the rose bush and stems.

2. Identifying and Removing Dead Wood

You should now focus on spotting and removing any dead wood by making a small cut into the cane. If you notice the inside is brown, it is dead, while green will indicate that it is healthy. Remove all dead wood down to the plant’s base.

3. Create an opening in the plant’s center.

The center of the plant needs to be opened once all dead wood has been removed. Look for branches that are crossing each other and can cause injury through rubbing, which may lead to infection or pests. Strive for a vase-like shape with branches that grow upward, as this promotes healthy growth while decreasing fungal disease risks.

4. Removing Thin, Weak Growth

Continue cutting, taking any weak growth with them. Remove any stems that are thinner than a pencil. These weak canes can reduce a plant’s vitality and prevent healthy blooms. By focusing on thicker canes, you can help the plant redirect its energy toward developing strong growth.

5. Pruning the remaining canes.

At this point, cut off the remaining canes. Cuts should be made about 1/4 to 1/2 inch above an outer-facing bud eye or node where the leaf attaches to the petiole. This causes new stems to shoot outwards instead of inwards, thus helping maintain an open structure. Additionally, ensure that cuts are made at a 45-degree angle pointing away from the bud so as not to allow any moisture retention that may cause rotting crops.

6. Sealing Fresh Cuts

Following pruning, it is essential to keep pests like rose borers from freshly cut canes. You should cover the cuts with a pruning sealer. Sealing wounds helps avoid diseases and maintains a healthy plant while it starts to recover from pruning.

7. Post-Pruning Cleanup

Once you are done with pruning, ensure that the area is cleaned thoroughly. All fallen leaves or branch pieces should be removed, as they can harbor diseases and pests. Between plants, wipe your pruning tools with isopropyl alcohol to prevent the spreading of pollutants you will have wiped off.

8. Nourishing Your Roses by Fertilizing

Finally, roses are ‘big eaters’ and require proper nutrition for maximum growth. Apply a slow-release fertilizer to the roses after pruning. Such a fertilizer will provide the essential nutrients needed for vigorous growth and bright blooms during the growing season.

Techniques For Pruning Different Rose Varieties

Pruning methods differ according to the kind of rose being dealt with.

Height of Pruning

Generally, prune the rose bushes to the height that one wishes, keeping the shape uniform. Hybrid teas that are cut at lower heights yield bigger flowers and longer stems suitable for cutting. On the other hand, taller pruning produces many small flowers.

Climbing Roses

Climbing roses have two types of canes: the main ones at the base and the lateral ones, which bear flowers. While all forms of pruning apply here, it matters less about shaping them out. However, it is recommended that lateral canes be pruned at any time to support blooming.

Knock Out Roses

Knock-out roses are pruned in the second or third season, generally late winter or early spring. Since they bloom on new growth, one should first remove old, dead, and broken canes by cutting them back to ground level. You should prune about one-third of their height. Deadheading will encourage new flowers.

Rose Hips

In warmer climates, leave rose hips on through fall and winter to signal dormancy. In colder areas, roses naturally enter dormancy, but in warmer regions, allowing hips to form can help trigger this process.

All in all, pruning roses may seem daunting, but with the right tools and techniques, it becomes a rewarding practice that promotes healthy growth and stunning blooms. By following this step-by-step guide, you can confidently maintain your rose bushes, prevent diseases, and ensure vibrant flowering. Remember, proper timing, careful cuts, and consistent care make all the difference. Embrace the process and enjoy the beauty of well-pruned roses in your garden

What are The Best Indoor Plants for Your Home

Are you wondering how you will brighten your house’s less bright and sunny rooms? Do you want to add color and beauty to your dark office, bedroom, or bathroom? You should consider adding indoor plants. Adding indoor plants is one of the best ways to transform and brighten any room.

The majority of indoor plants do not require much water. Therefore, you are required to water them after several weeks. Some plants do not need much sunlight and thrive even in the dark. However, others require indirect sunlight or direct sunlight. As a result, you should consider each plant’s different requirements before you consider purchasing one.

Pay attention to the amount of space you have in your house. While some small plants, such as peperomia, may fit in small spaces, the large ones, such as orchids and focus, will need ample space.

Research has found that indoor plants have more benefits besides brightening your living area. Indoor plants act as air purifying agents, helping filter out any harmful chemicals from the air. Therefore, your family will get to breathe fresh air, which will lower anxiety and stress. Here are the top indoor plants that will help brighten any room in your home. 

Top Best Indoor Plants to Brighten Your House

Here are the best indoor plants:

1. Peace Lily

We start our list with Peace Lily, a plant that exudes tranquility. Peace Lily has glossy leaves and white blossoms. In addition, it has been ranked among the best air-purifying indoor plants.

In terms of lighting, it requires indirect sunlight ranging from low to medium. You only need to water it when you feel the soil is dry. Furthermore, water it if the leaves begin to droop. Peace Lily can grow to about 2 or 3 feet tall.

2. ZZ Plant

ZZ plant is an excellent indoor plant for beginners. It requires indirect sunlight, but it also tolerates low to medium sunlight. It grows to about 2 or 3 feet and should be watered sparingly to avoid root rotting.

3. Golden Pothos

If you are busy and don’t have much time to take care of indoor plants, you will love Golden Pothos. Golden Pothos, also called Devil’s Ivy, has green and yellow leaves that require watering if the soil feels dry. These leaves are heart-shaped, and their trailing vines can easily be styled to form a green curtain, refreshing your interior. The plants grow over 20 feet long and require low indirect light.

4. Spider Plant

A spider plant is an excellent choice if you want an indoor plant to hang on your wall. The plant requires occasional watering, and it does well with indirect light. When hung, its dramatic curved leaves enhance the interior of the house.

5. Fiddle-Leaf Fig

If you are looking for a stylish indoor plant, Fiddle Leaf Leg is among the options you should explore. The plant creates a significant visual impact with its large leaves and tall appearance. It requires bright indirect sunlight and should often watered once the soil is dry. This plant fills up an empty corner in your house with its towering presence. In addition, the plants act as a natural air purifier.

6. Monstera (Swiss Cheese Plant)

Monstera has large iconic split leaves, and its size usually ranges from 3 to about 15 feet in height. Therefore, this is an ideal indoor plant for the large spaces. The plant adds a touch of sophistication with its tropical appearance, transforming a room. It should be placed in an area with bright, indirect sunlight. You can water it weekly to maintain moist soil.

7. Snake Plant (Sansevieria)

Place snake plants in an empty corner of any room, and their tall leaves in various colors will add architectural beauty. This plant will grow up to 4 feet tall and requires indirect sunlight. In addition, you only need to water it occasionally, making it suitable for people with busy schedules.

8. Rubber Plant

The Rubber Plant is famous for its large, glossy leaves, which enhance its visual appeal. This plant should be placed in an area with bright and indirect light. In addition, it should only be watered once the soil is dry. It is recommended to be placed in the seating area to enjoy its view.

9. Anthurium

Anthurium is known for its heart-shaped flowers that give the plant a vibrant appeal to a room. It requires occasional fertilizing and should be watered weekly. Anthurium adds a pop of color to any room. You should store it in an area with bright indirect light. In addition, the plant grows optimally in well-drained soil.

10. Bird of Paradise

Birds of Paradise have large, banana-like leaves. It is suitable for large indoor plants. Its exotic beauty enhances the room’s appearance. The flowers have a mix of bright orange and blue petals, creating a unique display.

It should be watered after the soil is dry and placed in bright, indirect sunlight.

11. Aloe Vera

Aloe Vera has to be placed in a tall pot, which helps keep the leaves off the table. You should plant it in well-draining soils, and it should not be overwatered. Its leaves contain gel, which is known for its medicinal properties. The gel is used to treat minor burns and help to achieve smooth, dry skin. It does well in bright, indirect sunlight and should be watered weekly.

12. Chinese Money Plant

Chinese Money Plant has unusual round leaves that enhance any room’s interior. You should ensure it is placed in an area with indirect sunlight. In addition, it should only be watered when the soil is dry.

13. Philodendron

Philodendron is an excellent indoor plant that requires minimal maintenance. These indoor plants transform your living room with their lush foliage. They need to be watered seasonally and placed in bright, indirect light.

14. Jade Plant

Jade plants thrive with minimal water and add elegance to any room. They require medium sunlight. You should place this plant in a vibrant pot as this helps its green leaves, which have red tips to pop, enhance your interior easily.

15. Parlor Palm

Parlor palm is among the best indoor plants that thrive in low-light conditions. Its feathery, arching fronds create an elegance. These plants grow up to 8 feet tall and should be kept in moist soil.

16. Money Tree

Money Tree is a diverse indoor plant growing faster in medium to high indirect light levels. However, it also thrives in low light levels. Many people usually choose this plant due to its compact size.

17. Aglaonema

Aglaonema is also referred to as Chinese Evergreen. It has colorful leaves and green with pink splotches that enhance the room’s interior. They can grow up to 3 feet tall and only need bright indirect light, with one watering them when the soil is dry. 

18. Cast Iron Plant

Cast Iron Plant, also known as Aspidistra elatior, has made a name for tolerating extreme conditions such as low-lighting conditions and irregular watering. The plant adds elegance with its long green leaves, making it compatible with various interior styles.

19. Air Plants

Air Plants are another incredible indoor plant that thrive without soil. They live on air and need periodical misting or soaking, making them simple to maintain. Air plants must be soaked in water for at least 10-20 minutes weekly. In addition, keep them where they will receive bright indirect sunlight.

20. Ponytail Palm

The Ponytail Palm has a unique appearance with its thick, swollen base. Its long, curly leaves create an arch resembling a ponytail. To ensure optimum growth, keep it in bright, indirect light and ensure minimal watering. Allow the soil to be completely dry before you water it. When Ponytail Palm is given proper care, it can last many years.

21. Dragon Tree

The Dragon tree is a suitable indoor plant for bright, indirect sunlight. It requires minimal watering, making it ideal for those who forget to water plants. In addition, it can grow up to 6 feet and be kept in small spaces. It does not require pruning or grooming.

22. Marble Queen Pothos

To grow marble queen pothos, ensure an area with medium, bright, and indirect light. This plant grows fast, and they are easy to care for. Two to three inches of the soil should allowed to dry before watering it. Remember to remove dead and discolored leaves using scissors. 

23. Watermelon Peperomia

Watermelon Peperomia is a common indoor plant in many homes due to its easy maintenance requirement. Its green leaves, which have silver stripes and red stems, brighten a room. In addition, they require minimal space and should be placed in areas with bright, indirect light, avoiding direct sunlight, which can result in leaf fading. Watering should be done sparingly.

24. Begonia Maculata

Begonia Maculata requires watering at least two times a week. The plant is known for its spotted leaves and does well with occasional fertilization.

25. Prickly Pear Cactus

Prickly Pear Cactus is an excellent indoor plant for those who want to add a natural beauty touch. This plant has unique paddle-shaped pads with tiny sharp spines, making it eye-catching. The plant does well in areas with bright, indirect sunlight and requires watering only after the soil is completely dry, making it easier to maintain.

26. Bird’s Nest Fern

With its thick, glossy leaves, the Bird’s Nest Fern adds a refreshing feel to a room as the glossy leaves form a rosette pattern. It thrives in conditions with bright, indirect sunlight. Watering should be done regularly since it requires regular moisture.

27. Janet Craig Dracaena

Janet Craig Dracaena brings a sense of tranquility to a room. The plant has long, arching leaves that create a sophisticated appearance. There are different varieties of this plant, and they all require medium indirect light. It can grow up to 10 feet tall, and the soil should be lightly moist.

28. Sweetheart Waxplant

As the name suggests, the plant is heart-shaped and can be an excellent gift to a loved one who requires an indoor plant. It has glossy, thick leaves, making it appealing but it needs low maintenance. The plant does well in low or medium indirect light. You can water it once a month, making it a deal for travelers.

29. Rooted Greenery Red Prayer

Rooted Greenery Red Prayer thrives in bright, indirect light. The plant can grow up to 12 inches tall in optimum conditions, ideal for small spaces. The deep green leaves with red veins provide a vibrant look in a room. In addition, did you know that its leaves fold up at night, giving the home decor a dynamic touch? It does well in humid conditions and is suitable for kitchens or bathrooms.


In conclusion, incorporating the best indoor plants into your home can significantly enhance both the aesthetic and air quality of your space. Whether you have a small or large area, there’s a perfect plant to suit your needs. By selecting plants that thrive in your environment, you can create a brighter, more vibrant atmosphere while benefiting from the natural air-purifying qualities they offer.

How to Create More Space in Your Closet

Is your closet jumbled? We have all found ourselves in such scenarios. Well, worry no more! Closets have, for many years, been essential in our homes as they help avoid a chaotic mess of clothes. However, as we continue to purchase new clothes, we find ourselves with no space to keep them. Before you consider adding extra closets, which may be costly, there are alternatives you can use to maximize space in your closet. This article will explore various ways you can use and create more space in your closet and remain organized.

Ways to Create More Space in My Closet

Here we have compiled some of the top ways to create more space in your closet:

1. Declutter

The first alternative to creating more space in your closet is decluttering. Decluttering is among the best ways to have more space in your closet. It mainly involves getting rid of the items you own that you no longer use or don’t need. To declutter your closet, you will start by removing all the items in the closet.

Now, you will separate the items into two groups. The first group will comprise the items you intend to keep, and the second group will include those you plan to give away or discard. Some individuals usually have difficulty deciding what to throw or give away or what to keep. Experts advise people to view this as creating more space for the things you love.

2. Evaluate Your Hanger Setup

If you have a terrible setup, you are likely wasting so much space in the closet, making it hard for you to organize your clothes neatly. In addition, having thick hangers or keeping the free wire hangers you get from the dry cleaner will take a large chunk of the closet. You can replace your bulky, mismatched hangers with slim, uniformed ones that are made of rubber. In addition, experts recommend that you use hanger hooks, which enable you to save space and prevent clothes from slipping.

3. Consider Seasonal Needs

One of the best ways to create more space in your closet is to organize your clothes seasonally. For instance, there is no reason you should have your Christmas clothes in the closet since you will only need them in December. You can store such items in labeled plastic bins. In addition, you can use labeled plastic bags to store bulky items like winter coats, which allows you to keep the coats you use daily in the closet. Ideally, the closet should have clothes you wear frequently.

4. Purchase Closet Organizers

If you are struggling to find space to store your items in the closet, you should consider purchasing closet organizers. One of the benefits of closet organizers is that they allow one to store folded items like sweaters, tops, or jeans, which most people hang. Therefore, this will enable you to save space.

A hanging closet organizer takes less space compared to hanging clothes. These organizers serve as extra storage possibilities within the closet. DIY experts recommend this method to maintain the tidiness of the clothes and maximize the closet space.

5. Utilize All Available Space

Sometimes, your closet may seem complete, but you may not use it effectively. You should consider finding new ways to use every inch of space available. For instance, you may install floating shelves or hooks in the closet’s empty wall space. In addition, consider the possibility of hanging items such as belts, hats, or jewelry on the hooks. The above methods are some of the few ways that will allow you to optimize your closet’s space, hence enhancing the closet organization.

6. Incorporate Extra Bars and Shelves

You should assess the closet’s vertical space to see if you can install additional storage options. Some individuals install an extra hanging bar under the current one. As a result, the closet can handle more clothes. In addition, you may consider raising the current bar to have additional space in the closet.

You may add more shelves above or below the closet’s hanging bar to store more items, such as shoes. Additionally, you can play around with various designs until you find the best one.

In conclusion, learning how to create space in your closet is all about smart organization and making the most of what you already have. By applying the tips shared in this guide, you can maximize storage, reduce clutter, and keep your closet functional and tidy. A well-organized closet not only saves you time but also enhances your daily routine. Start transforming your space today and enjoy the simplicity of an organized lifestyle!

How to Measure Your Ring Size Accurately

Many people find measuring their ring size intimidating, thinking it’s complex. However, with the right methods and simple tools, you can accurately determine your ring size from the comfort of your home. Knowing your correct ring size ensures a perfect fit, making your shopping experience stress-free. In this step-by-step guide, you will learn how to measure your ring size accurately. It will explore the most effective ways to measure ring size, tips for accuracy, and the importance of a proper fit.


1. Measuring Your Ring Size with a String

One of the most common and accessible methods to determine your ring size is using a string. Follow these steps:

Step 1: Use a Non-Stretchy String

Cut a piece of non-stretchy string to avoid inaccurate measurements caused by pulling. Stretchy materials may result in a larger size.

Step 2: Wrap the String Around Your Finger

Wrap the string around the base of your finger. Avoid wrapping too tightly, as this could make the ring uncomfortable or difficult to remove. Leave slight room to accommodate finger swelling.

Step 3: Mark the Overlap Point

Use a pen to mark where the string overlaps.

Step 4: Measure the String

Straighten the string and measure its length with a ruler. The measurement represents your finger’s circumference.

Step 5: Match to a Ring Size Chart

Use a standard ring size chart to find the size corresponding to your finger’s circumference.

2. Measuring Ring Size with a Ring Size Chart

If you already own a ring that fits well, you can use a ring size chart to determine the size:

  1. Place your ring on the printed circles until one matches the inside diameter of your ring.
  2. Print the ring size chart at 100% scale for accuracy.

3. Using a Ring Sizer

A ring-measurement tool is the most precise tool for measuring a ring size. Ring sizing tools are available in many online shops and are affordable. If you are shopping for ring-sizing tools, you will find two types:

Using a Measuring Tape Ring Sizer: If you choose a measuring tape ring sizer, here are the steps you should follow to determine your ring size.

  • Wrap the measuring tape ring sizer around the finger. You should either tighten or loosen the measuring tape until it fits well. It is essential to ensure you can easily and comfortably slide the sizer over the knuckle.

Using a Keyring Type Ring Size: One of the key features of a keyring-type ring sizer is that it features metal loops for each ring size. Therefore, you should try them on the finger until you get the one that fits comfortably.

The Proper Fit

After obtaining the right ring size, purchasing your ring is next. Some individuals do not understand what we mean by a proper fit ring. Generally, most jewelry specialists advise buyers to purchase a ring that is snug enough to ensure that it does not fall off. In addition, a proper fit ring should not cause you any discomfort by it being too tight. A ring should slide over the knuckle with minimal resistance. This will allow you to take it off without any difficulty easily. 

Ring Size Guide

The United States (U.S.) rings range from size 3 to 13.5 inches for adults.

Each ring size is equivalent to the ring’s width in millimeters. For example, a finger with a circumference of around 14 millimeters can fit nicely into a size three-ring.
Please be aware that these sizes rise gradually. For every half-size increase, the standard ring size increases by 0.4 millimeters. The measurements of the size three ring are 14 mm, the size 3.5 ring is 14.4 mm, and the size four ring is 14.8 mm.

The size range for men’s rings is 8 (18.2 mm) to 14 (23 mm). Conversely, the range of women’s rings is 3 (14 mm) to 9 (19 mm). Men’s ring sizes typically range from 10 to 11, while women’s range from 5 to 7.

As a buyer, always ensure you get a proper fit ring.

Ring Sizing Tips

If you are still not sure how you will get the right ring size, here are additional tips to help you:

Measure Multiple Times: Experts advise buyers to measure their fingers 3 to 4 times. This is attributed to the size changes based on the temperature. Individuals who wear rings will notice they get smaller during the cold season and more swollen when overheating.

Get Measurement of The Finger That Will Wear The Finger: There are instances where the ring finger is larger or smaller on one hand compared to the other. Therefore, getting the finger measurements that will hold the ring is essential. 

Knuckle Size: Individuals with bigger knuckles are advised to opt for half a size larger than the finger measurement. If you do not follow this guideline, you may face issues as wearing the ring properly may be difficult.

Take Measurement At The End Of The Day: The size of fingers will vary due to weather and time of the day. Therefore, to achieve the most accurate results, take the finger measurements in the evening when the hands are warm. During morning time, cold temperatures may reduce the size of the finger hence getting smaller and incorrect measurements.

FAQ

How Do I Decide The Correct Ring Fit?

Your ring should fit snugly without becoming too loose. Furthermore, it shouldn’t be very tight because that would be uncomfortable. The proper ring size for any individual should easily slide over the knuckle.

How To Secretly Identify Someone’s Ring Size?

By asking their family or friends, you can easily identify someone’s ring size without them knowing. Moreover, you can also measure the ring they wear.

How to Organize Clothes in Drawers Efficiently

We all know people who struggle with organizing clothes in the drawers, as this seems daunting. One of the reasons linked with this struggle is the lack of an organized system that works for them. Unlike closets, drawers are more prone to getting cluttered and disorganized as items are not more visible. As they say, “out of sight, out of mind.” In this step-by-step guide, you will learn how to organize clothes in drawers efficiently. We will focus on the steps you need to take to simplify drawer organization, which will change messy spaces into well-arranged spaces and make your room look more pleasing.

Why Choose Drawers to Organize Your Clothes

Are you undecided on whether to use drawers to organize your clothes? Well, the time is now! Drawers are a versatile way for clothing storage as they provide several benefits that make them valuable. Here are some benefits of organizing clothes in drawers:

Easy Accessibility

The essential advantage of incorporating drawers for clothing storage is the convenience it provides to an individual. People who use closets sometimes have to hang their clothes. In addition, sometimes you search through stacks, which leaves a lot of mess. Well, drawers streamline how you access clothes. If you need to find and collect certain items, all you have to do is open the drawer, and you can easily access items without much difficulty. 

Allows For Compartmentalized Storage

Do you want to categorize your clothing and keep the wardrobe tidy? Then, purchase drawers, which allow you to create sections for various clothes using dividers and organizers. This means you can have sections for different clothing, such as activewear and swimwear.

Protection From Dust And Sunlight

Drawers protect clothes from dust and sunlight using enclosed storage. As a result, the quality of delicate fabrics is preserved. In addition, it will prevent fading or any damage to the clothing.

Ideal For Smaller Items

Drawers help you effectively organize smaller items, such as socks. Mixing smaller items and large ones results in disorder. Therefore, drawers minimize clutter and allow for fast retrieval.

Step-by-Step Guide on How to Organize Clothes in Drawers

Let us delve into steps to follow when organizing clothes in drawers:

Step 1: Declutter Your Items

Before organizing clothing in drawers, assess your wardrobe to declutter the clothes. One of the easiest ways to declutter your clothing is to choose which items you intend to keep, discard, or donate. You must focus on the clothes you love and regularly wear and eliminate duplicates or items that do not fit you. To be precise, if you have clothes you have not worn in over a year, consider donating or discarding such items.

We all have clothes we don’t wear, but we cannot discard them as they carry sentimental value. Store these items separately, ensuring that the drawers only have items that you utilize. As a result, this maximizes space. Removing unnecessary items creates a base for an organized drawer system.

Step 2: Clean & Measure Your Drawers

Do not start organizing your clothes in drawers before comprehensively cleaning the drawers. Removing dust and dirt by wiping down the surfaces allows you to have a new beginning for your clothing. Once you are done cleaning, get the measurements of the drawers. Besides, you should focus on the height, width, and depth. You can perform the exercise two to three times to get the correct measurements.

Moreover, it is important to get the precise measurements used to purchase and select organizers and dividers. You should consider items such as bins, dividers, and trays to help maintain the tidiness of the items. A clean and precisely measured drawer allows for an organized clothing storage system.

Step 3: Sort Your Outfits

The third stage is to sort your clothing. You can group your clothes based on the type, such as shirts or jeans. It is recommended you organize clothes based on frequency of use. This means essentials like underwear are kept in the top drawers for easy access. On the other hand, torn seasonal garments are kept in lower drawers. Remember to use dividers or small bins to separate these categories and maintain tidiness.

Step 4: Put Everything Away

We are at the most essential stage of organizing clothes in drawers. After sorting your clothes based on type, size, and color, neatly fold them. It would be best if you used dividers to separate items by their category. If you intend to improve visibility and accessibility, vertical stacking is recommended. This method allows you to view all the items at one glance without digging through the stacks.

Additionally, if you possess more oversized items, you may consider utilizing a folding board to help maintain uniformity. As indicated above, frequently worn clothes should be in the top drawer, while those rarely worn are in the lower drawers, enhancing accessibility. One major mistake most people make is overstuffing their drawers, making them less tidy. Don’t overstuff the drawers to maintain tidiness.

Step 5: Continue to Stay Organized

The easy part of organizing clothes in the drawers is done, and the hard part of ensuring top-quality cleanliness is challenging for many people. One way to keep the drawers organized is by labeling them. This ensures everything remains organized in its proper place. This tip is helpful, particularly if you share the space with a roommate. It is essential to display focus by tidying up regularly. In addition, you should deal with any mess as they arise before they escalate.

Furthermore, you should develop a habit of quickly refolding any items that are placed in the wrong section. It is advisable to adjust dividers as promptly as possible. In the future, you will purchase new clothes. You may want to remove old clothes you no longer use to avoid overstuffing and maintain order. If you pay enough attention to your drawers, they will stay organized. Therefore, you will not have a hard time retrieving items.

In conclusion, organizing clothes in drawers seems daunting at first. However, if you successfully arrange the clothes in drawers, it will improve the look of your room. Having well-organized drawers makes it easy to retrieve items you require, and it helps prevent the fading of delicate garments. By following the steps above, you will improve your clothing organization.

Exit mobile version